EVERY YEAR THE passing game in football gets more and more complex. Even at the high school level, defensive coaches lose sleep trying to counteract the various formations and schemes that offenses present each week.
Coverage disguises have helped our team slow down some of the most high-powered offenses. Defenses always play best when they’re simply moving and reacting. With disguised coverages, we leave the thinking and uncertainty to the quarterback.
The following disguises can be helpful to your program and will give you ideas that you can adapt to your own defense.
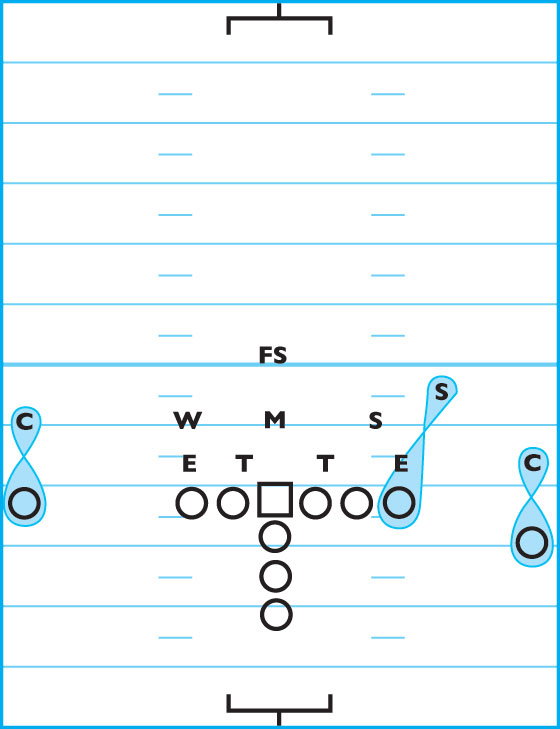
Base Alignment: 4-3 Cover 2
DIAGRAM 1: 4-3 Cover 2.

Often we’ll align in a 4-3 with a standard Cover 2 look. This gives us the typical 5-under, 2-deep zone coverage.
Even though this is an excellent cover, it leaves a soft spot between the corner and Sam or Will linebacker, especially if your LBs are slow to react to a slant or curl. In addition, you must also have two very athletic safeties to cover the deep half of the field.
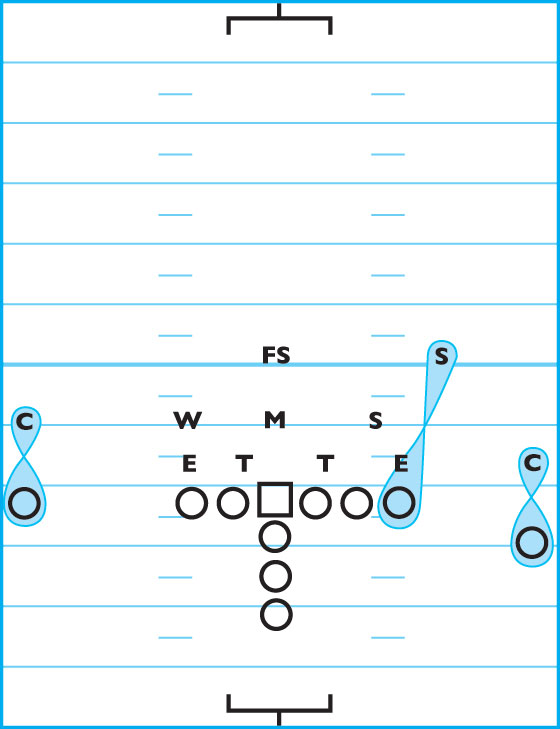
Adjustment No. 1: Man/Free
DIAGRAM 2: Post-Snap Man/Free Cover Look.

After aligning in a Cover 2 look, our secondary jumps to a man/free coverage prior to the snap. We scout the cadence of the opposing QB to give us an edge in this regard.
This coverage can be especially effective on third-and-intermediate yardage downs where a slant or quick throw is the preferred route by the offense.
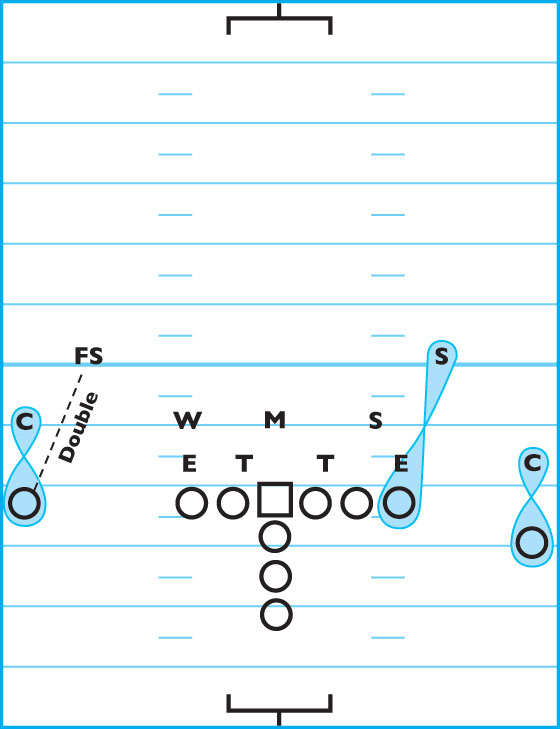
Adjustment No. 2: Double-Team The Split End
We often run into teams with a great split end. This coverage again starts out in a Cover 2, then shifts to man coverage early in the QB’s cadence.
DIAGRAM 3: Pre-Snap Look For Doubling-The-SE Coverage.
Finally, the FS will move over and double with the corner on the SE side. This gives the QB a false read by getting him to believe he has single coverage on his SE.
DIAGRAM 4: Post-Snap Doubling-The-SE Coverage.

Adjustment No. 3: Man To Cover 2
Here again you want to give the QB the idea that he has single coverage on the outside. But in reality, he’s getting a two-deep coverage.
DIAGRAM 5: Pre-Snap Man To Cover 2.
The corner aligns as if he’s in man, then moves outside the SE and flanker. The safeties will move back into a standard two-deep look.
DIAGRAM 6: Post-Snap Man To Cover 2.