Spread Punt Pins Offenses Deep
By Mike Sabock, Assistant Football Coach,
Northern Illinois University, DeKalb, Ill.
THE SPREAD PUNT is a great weapon to use to win the field-position battle. With special teams, it is essential to practice your formations and make sure that each of your players knows exactly what their assignments are and the opposing player they are responsible for.
Here are some general concepts that must be in place for the Spread Punt to reach its fullest potential:
1 Get Off Time: The snapper and the punter must effectively work together. The faster your snapper is, the more time your punter has to get a punt off. If your snapper is slow at delivering the ball, your punter must be able to get the ball off quickly.
You can’t coach a punt team without a stopwatch in your hand!
From the snap to the punt, any time over 2.1 seconds increases the chance of a blocked punt. As a general rule, you want the snap to take only .8 seconds and the punter to catch and punt the ball in 1.3 seconds.
2 Equal Practice: Work your No. 1 and No. 2 punt teams equally in practice. If the backup at a position is not prepared and has to play, a mistake he makes on one punt can cost you the game. This is the one phase of football that your backups need as many repetitions as your starters.
3 Personnel: The punt team is not the place to try to fit a second-or third-team player. Players who are best at executing blocking techniques and covering the field are the ones to use. If you have starters who are on your punt team because they are the best, then so be it.
However, sometimes your starters may not be the best because they think the punt is a time to relax a little. You must combat that attitude and realize that sometimes you can find a backup or third-team player that can execute your protection techniques and do it with 100 percent effort. Don’t use a player if he’s not going to do it perfectly and with great effort.
Spread Punt Formation
DIAGRAM 1: Positions, Alignments
Rules: Guards and tackles line up with the inside foot forward and their outside foot back. We want the OGs and OTs to be back off the ball as far as legally possible. This provides maximum separation between your punt team and the rushers.
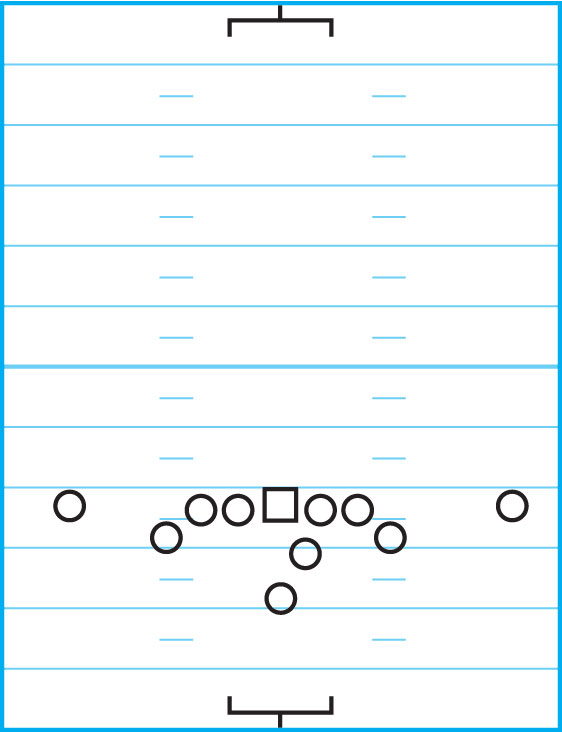
Stance: The OGs, OTs and wings use the same stance. Their inside foot is up and their outside foot back with at least a 1 foot separation between the heel of their front foot and the toe of the back foot. Hands should rest lightly on the thighs and the facemask should be over the front toes.
Splits: The split between the OGs and the center is 6 inches. If the center cannot snap and block to his right or left very well, you may have to go foot-to-foot with the OG and center. The OTs take a 1-foot split between themselves and the OGs. The wings align with the inside tip of their shoulder pads even with the outside tip of the OT’s shoulder pads. The wings are aligned at a depth where they can reach out and just touch the rear end of their OT.
DIAGRAM 2: Technique: As the ball is snapped, the technique should never vary. Linemen should take three steps backward, starting with the inside foot.
This maintains as much separation between your blockers and the rushers as possible. This is essential to block twists. The steps should be fast and long. Players want to be as deep as they can be on the third step.
It is also important that all linemen obtain the same depth at the same time. There must be a solid wall of blockers after these steps are taken.
DIAGRAM 3: Forming A Solid Pocket: The wing’s technique varies slightly. Wings line up with the same stance as the OGs and OTs, but their three steps are slower which allows the OTs to catch up with them to form a solid pocket from which to punt the ball.
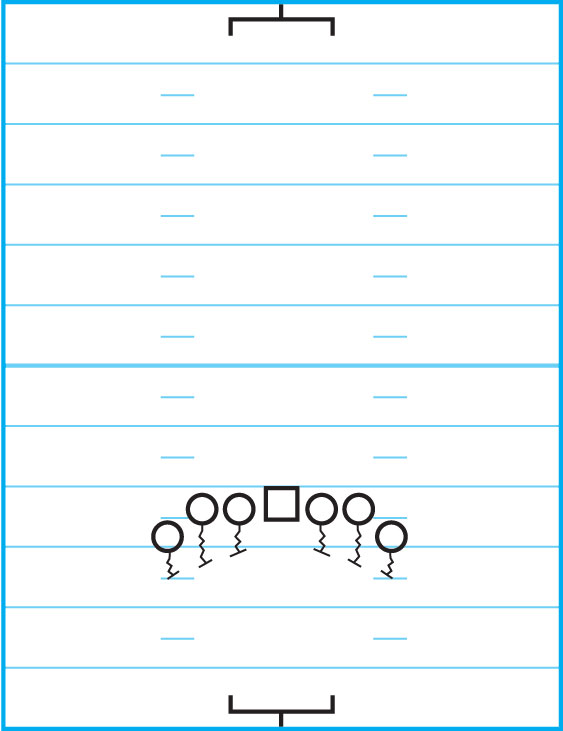
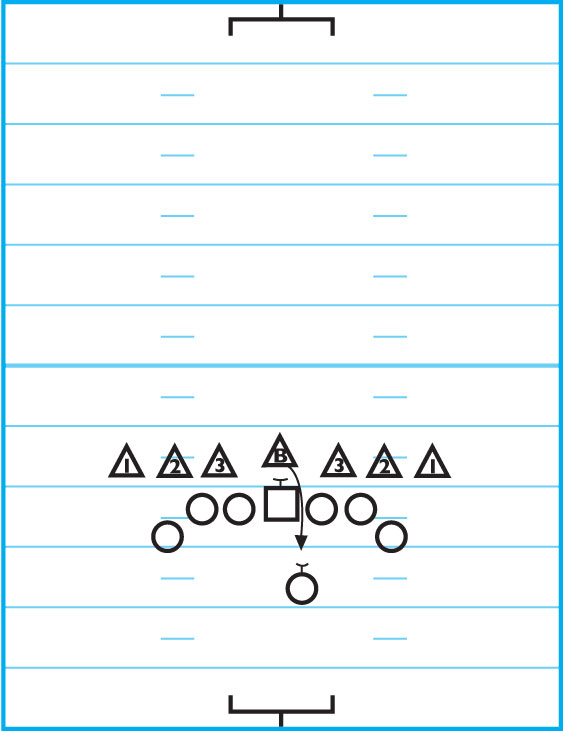
DIAGRAM 4 (A, B, C and D): Assignments: We are a zone-to-man combination protection team. We assign a man, but if the rush team twists, we trade men. Our count system is from the outside-in.
Player responsibilities:
Wings: Block the 1s.
Tackles: Block the 2s.
Guards: Block the 3s.
Center and Personal Protector: Block the 4s and 5.
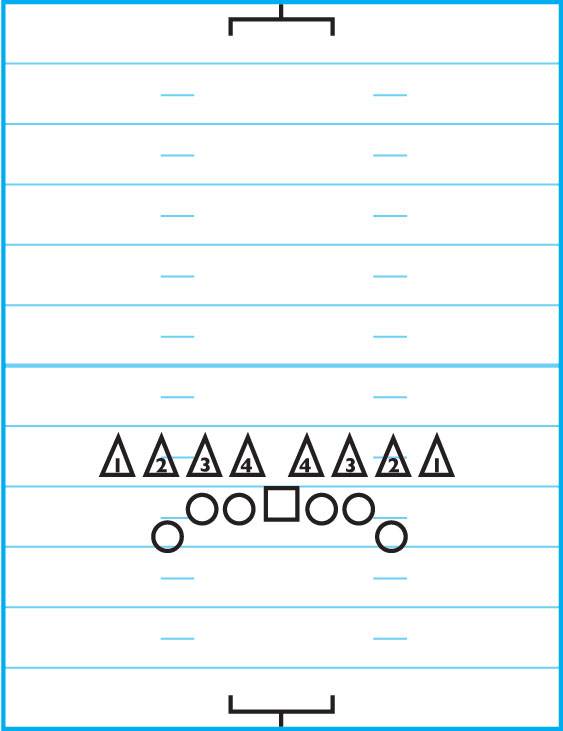
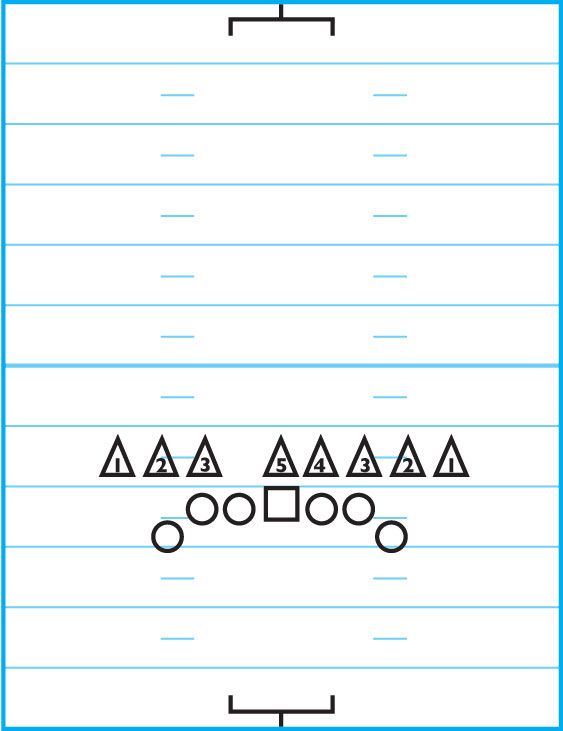

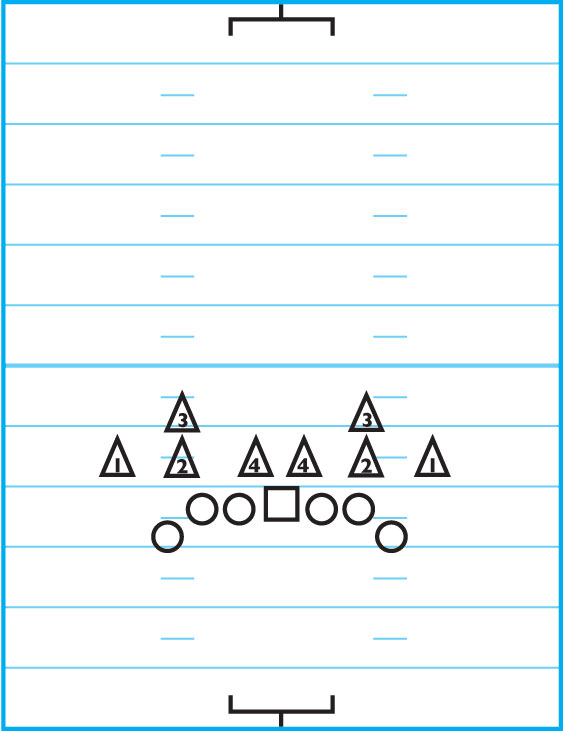
DIAGRAM 5: Assignments Part II: As we line up, each player counts from outside-in to find their man. Blockers keep their eyes on the assigned opponent as they take three steps back. If the rusher comes toward a blocker, he blocks him after the third step.
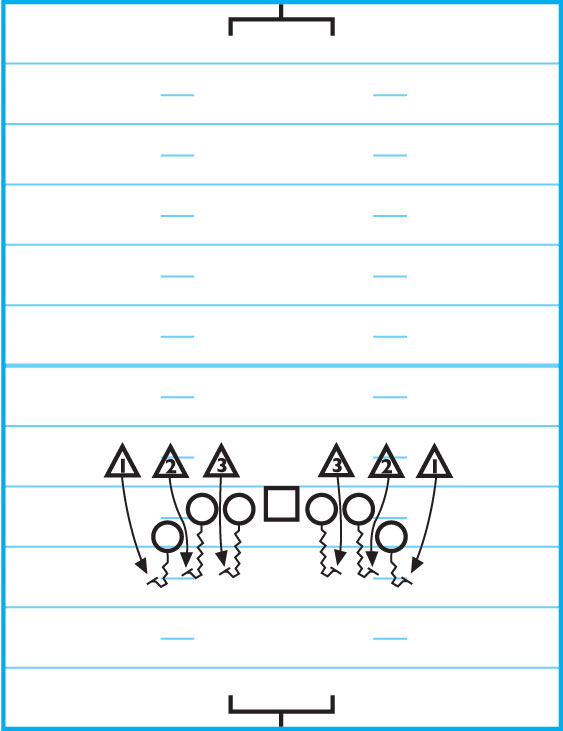
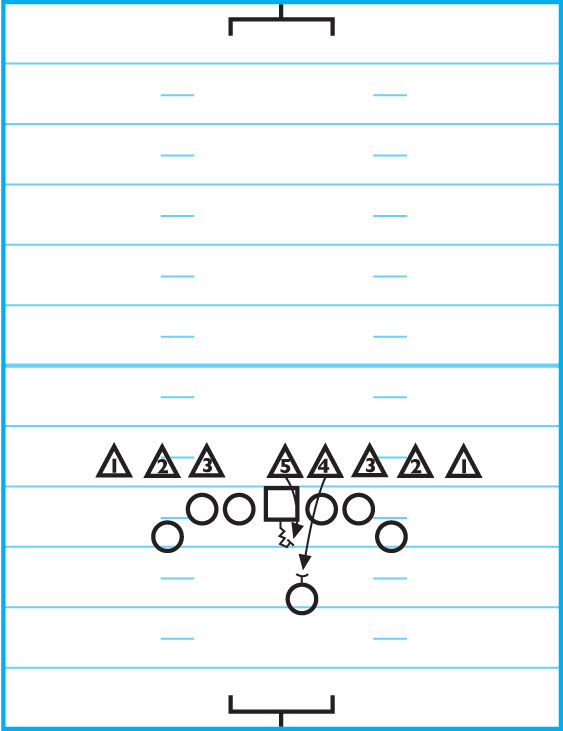
DIAGRAMS 6, 7: If the opponent crosses with another rusher before he gets to the blocker, he blocks the new man.
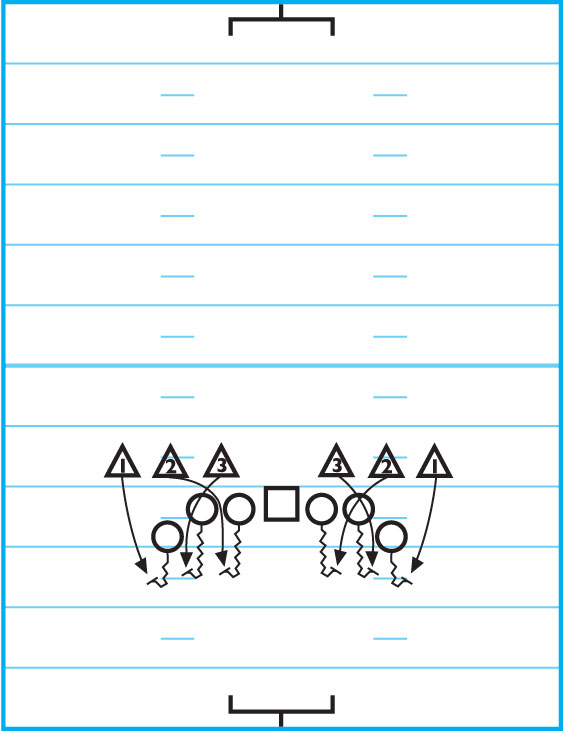
DIAGRAMS 8, 9: As long as the OGs,and OTs take the same steps at the same speed and get to the same depth, there are no rushers that can’t be blocked by a wing, OG or OT. They are always responsible for players 1, 2 and 3.
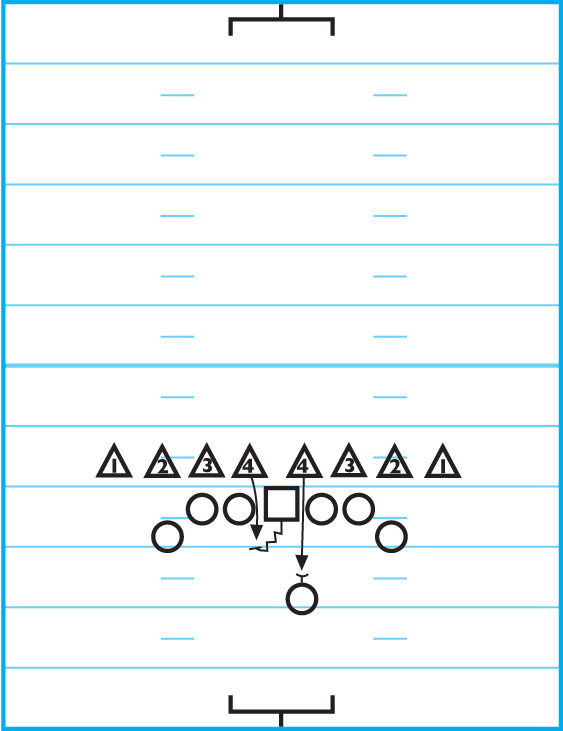
The Personal Protector is responsible for locating the 4 and 5 rusher. He makes a call to tell the snapper whom to take. He is responsible for the other player himself.
DIAGRAM 10: As the center blocks, he must cushion at a 45-degree angle in the direction of the man he is blocking. The center should make his block 4-yards behind the line of scrimmage.
DIAGRAM 11: Coverage: In the Spread Punt formation, the gunners need to make a lot of tackles. If return teams are going to single-cover gunners, you need positive production from this position.
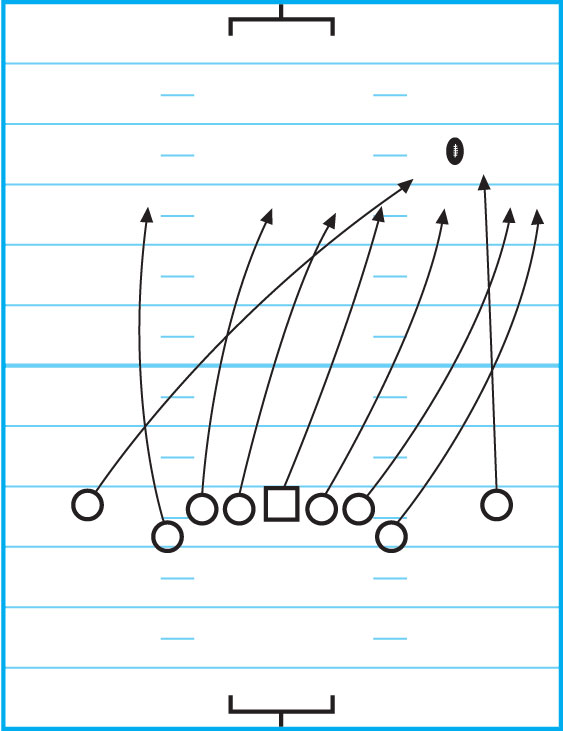
Punt the ball and try to constrict the full field down to two-thirds of the field. You want the ball to land outside the hash mark in the direction you call. This concentrates your coverage on two-thirds of the field instead of fanning the entire field.
Players will cover from the hash away from the directional call, to the sideline of the called part of the field. If the ball isn’t kicked where it is supposed to be, your players must be trained to adjust their coverage lanes on the run.