Proper techniques – from having the correct grip to managing footwork during passing drops – can improve
the mechanics of your quarterback.
There is an old coaching adage that “you can’t change a throwing motion.” A QB can either throw or he can’t. Many coaches pass the ball when they have to pass the ball and not develop their young quarterbacks.
I hear all the time that a quarterback’s mechanics can’t be changed. I believe it says more about the coaches thaan it does the kid. The message it sends, however, is that, “We don’t have the time to improve the kid’s throwing mechanics.” Or, we don’t know how. We don’t have the technical skills needed to coach them correctly. The bottom line is there are thousands of high school kids that receive almost no coaching on their passing mechanics. You can’t expect these young men to enter your program ready to throw the football correctly.
Through my experiences as a head coach calling our offense, I realized how much a solid passing game meant to my offense. I went out and tried to get all the information I could on different types of passing games. I then took this information and put together a complete and solid passing game. My offense then became balanced between the run and pass. I knew in order to have a quality passing game, I needed to develop the quarterback to be able to execute it.
Can you improve a quarterback’s throwing motion? Yes, but it’s important to use the right methods. I felt that it was part of my job to develop each player to their fullest potential. So, each off-season I took the young man who was going to be our quarterback next fall and worked on the necessary things it took to execute our passing game. We would get together at 6:30 am, three days a week and work on learning to throw the ball correctly.
THE GRIP
The most important point on gripping the football is to make sure there is air between the palm and the ball. Also, it is important that the middle finger and the thumb on the throwing hand are placed right below the white ring on the football, almost even with one another. The smaller fingers then grip the seams and the index finger gives the hand some stability behind the ball. Once the grip is sound, the art of throwing a good football is a total body experience.
KNEE THROWS
We begin the learning process from the QBs knees. We start by teaching the QB how to load the ball into the loaded position correctly. We want the ball placed just above the pectoral muscle on the side of the throwing arm. I’ve always taught my QBs to keep the elbow of the throwing arm straight out or parallel to the ground. The off-hand will hold the ball in a natural position but opened up slightly to see the field. He then uses his off hand to push the ball back as the wrist is cocked beginning the throwing motion.
Next, we will load the front shoulder by rotating it to just under his chin. We will do this at the same time the ball is moved to the loaded position. We begin the throwing motion by pushing back with the off-hand bringing the ball back, cocking the wrist, and then bringing the ball over the top for the release. As the ball travels through the throwing motion, the elbow should be above the shoulder and the ball above the QBs ear. This is the top of the throwing motion (directly above the ear). It is where the speed of the hand begins its follow through. Leading with the elbow and pronating the wrist downward increases the ball’s spin rate when thrown. And it also increases the ball control with the fingers. I always use the term, “thumb down and palm out”.
The next thing I look at is the elbow. This is the joint that can cause the most problems for the throwing motion. The elbow must “lead” the throw. Most coaching suggests that if the elbow is simply over the shoulder or comes up over the top as it moves forward in motion, then that is sufficient. This isn’t always true. I want the QB to throw with his muscles and not his joints.
I first teach the correct throwing motion using just the upper platform. So, we begin to throw from the knees making sure the QB correctly loads the shoulder, cocks the wrist, leads with the elbow and pronates the wrist downward toward his opposite thigh following through to the ground.
KNEE WORKOUT
The knee workout includes the following:
• 20 reps throwing 10 yards
• 20 reps throwing 15 yards
• 20 reps throwing 20 yards
Make the QB follow all the way through with his throwing hand. Correct any mistakes in his mechanics. Now turn sideways with one of his shoulders facing you. The second set of reps includes:
• 15 reps throwing 10 yards
• 15 reps throwing 15 yards
Then do the same sequence of reps turning to the opposite shoulder.
Finish the workout by having the QB set up against a wall, extend his arm to the top of his throwing motion and snap the ball off by moving his hand quickly downward and following through. Keep any body or trunk action to a minimal. We want the arm doing the work. Don’t worry about where the ball goes or whether the pass is accurate or not. Just work on the snap. This will help increase his throwing distance.
You can do these drills with a regular football or weighted footballs. I have used both. I prefer the weighted ball because it helps strengthen the arm at the same time. I start with a 20 oz. ball and add a 30 oz. football as workouts progress. You will still get good results with a regular ball. Every couple of weeks of doing these drills I will test arm strength for distance. After the first month of doing these drills, I would add throwing to various distances where a receiver would run a specific route. The QB, while on his knees, would twist his trunk and pass the ball to the outside shoulder of the receiver at the out route depth. This set of drills includes the following:
* 10 reps throwing a quick out route – 5 or 6 yards - from the right side.
* 10 reps throwing a quick out route from the left side.
* Repeating 10 reps of a quick out route from the right side.
* Repeating 10 reps of a quick out route from the left side.
Once I felt his arm was ready to make the throws our offense required, we added the lower platform to our teaching. We would still start each workout from the knees but adjusted the reps to make time for this teaching. The first drill I used for the lower platform was what I called a Step Over Drill. Have the QB line up behind a line and have him take a short step with the ball in the loaded position, crossing over the line pushing his chest out over his front foot ( step foot), and throwing the pass in the same manner he did when he was on his knees. It is very important to get your QB to get over his front foot when he is passing the ball. This will increase velocity and accuracy.
From the Step Over Drill, we will go to working on the QBs drops beginning with a 1-step drop in the gun and progressing to a 3-step drop. To perfrom the 1-step drop, we want the QB to grab the snap, load the ball as he stabs his backfoot and steps to the target and throw. He then “Grab-Stab-Throws” the ball.
We will start with targets to the left with a right handed QB. So when he loads the ball he must have his elbow opened opposite his throwing arm to see and deliver the ball away from the throwing arm. We want the QB to perfrom the step over drill at the target. We will start with a single receiver or passing net at the desired route location and have the QB throw the pass. Remember, you should begin with throwing mechanics over accuracy.
Then we will go to the 3-step drop from under center. The QB, with 80 % of his weight on the opposite foot, will simulate the snap and take one big step and two short gather steps to set up and throw the ball. Once again, we want the QB to open his elbow up so he can see the whole field and be able to deliver the ball with the same timing and accuracy on both sides. The QB will take the proper steps and deliver the ball with no hitch steps to the target.
I will time the drop or the snap time from the gun to the release of the throw so that the QB is getting used to releasing the ball quickly. Once the QB has performed these two drops to my satisfaction, I will add a second receiver or target to the route. I will do this by having the receiver show hands for the pass to go to him or keeping his hands down. The QB is now taught to hitch step, re-setting his feet and throwing to the second receiver. I tell the QBs that they “Read” with their feet and their feet must be right to have a successful pass.
Coaching Points:
• Always emphasize loading the ball and throwing the ball correctly. After a while, your QB will be able to coach himself because he understands the correct mechanics. If a pass gets away from him, I will ask what went wrong and he will tell me what he did wrong.
• Don’t allow your QB to take a big step when throwing to a target.
• The key to throwing the ball long or quickly is in the speed of the hand of the QB and getting on the front foot on the release. Always have him step to the target and reset his feet when going away from the target.
• The QB must always have his off-shoulder aligned with the target. Always take a short step in the direction of the target, leading with the elbow and following with the thumb.
• When your QB takes the drop from under center, be sure he opens his elbow so he can see the entire field. If he doesn’t do this, his back will be to the receiver opposite his throwing arm. He won’t be able to see the receiver or coverage to that side.
Once I’m satisfied with the 1-and 3-step drops, I will start on the 5-step from under center and 3-step from the Gun. Teaching the 5-step drop isn’t any different than teaching the 3. The QB takes a big step away, crossovers on the second step, has a quick third step, gathers on 4 and comes to balance on 5. We want the ball to go to the loaded position on the first step. I emphasize quickness over depth of the drop. You strive to get as deep as possible but the set up and getting the ball off on time is what’s important. From the Gun, the QB will grab the ball, step, crossover and step in the direction of the throw.
Once we’ve added the drops, we will throw to the targets simular to the 1-3 step drops and knee throws. The only difference is with the 5-step drop, we will add a third receiver or target to the progression. So the QB will take a 5-step drop and go through the progression of the route called. I will work on drops with QBs during the season and will have them call out their progression on each route while adjusting their feet with each progression. This is a excellent way to get your QBs to learn their progression.
Eventually, we will add receivers to the drops and work on timing the routes with the drops. Once we get all our receivers together, we begin to install our complete passing game. Our QBs should have the arm strength to do what we want them to do, so now we want to teach the route concepts to everyone. We always start with beating man-to-man because of the blitz. This also helps the timing of routes with drops and gets the ball out of the QBs hand as quickly as possible. Then we teach the different adjustments to coverages.
Included are seven different passing drills that should help the development of your QBs:

Drill # 1 – FIT THE NOOSE – The QB aligns about 15 yards from the receiver. He takes a 1-and 3-step drop and throws when the receiver shows his hands. The receiver runs at half speed to the second bag and then returns to the first bag showing hands for the ball. The receiver works on both rip and swim releases.
Drill # 2 – PAT AND GO – This is a vertical route drill. The receivers are aligned on the bottom of the numbers and work vertical, leaving five yards to the sideline as a drop zone. They run close to three-quarters speed looking for the ball. Corners run on the inside of the receiver and attempt to knock down the pass, not playing the ball. The QB takes a 3-step drop and places the ball on the outside shoulder of the receiver in the drop zone. Receivers rotate from one side to the other so they can catch the ball over both shoulders.
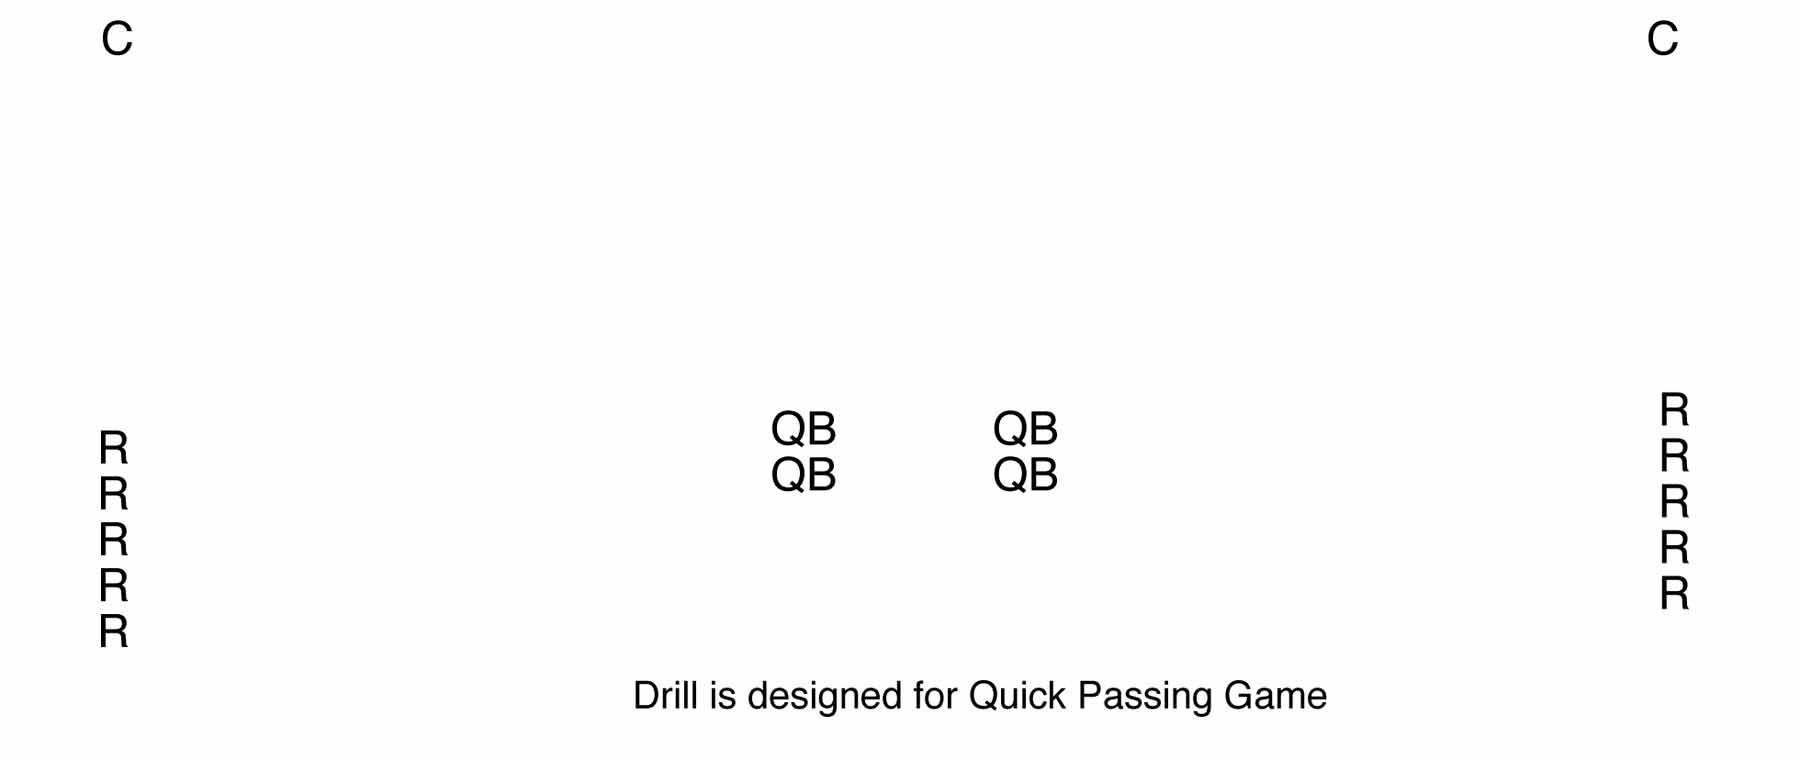
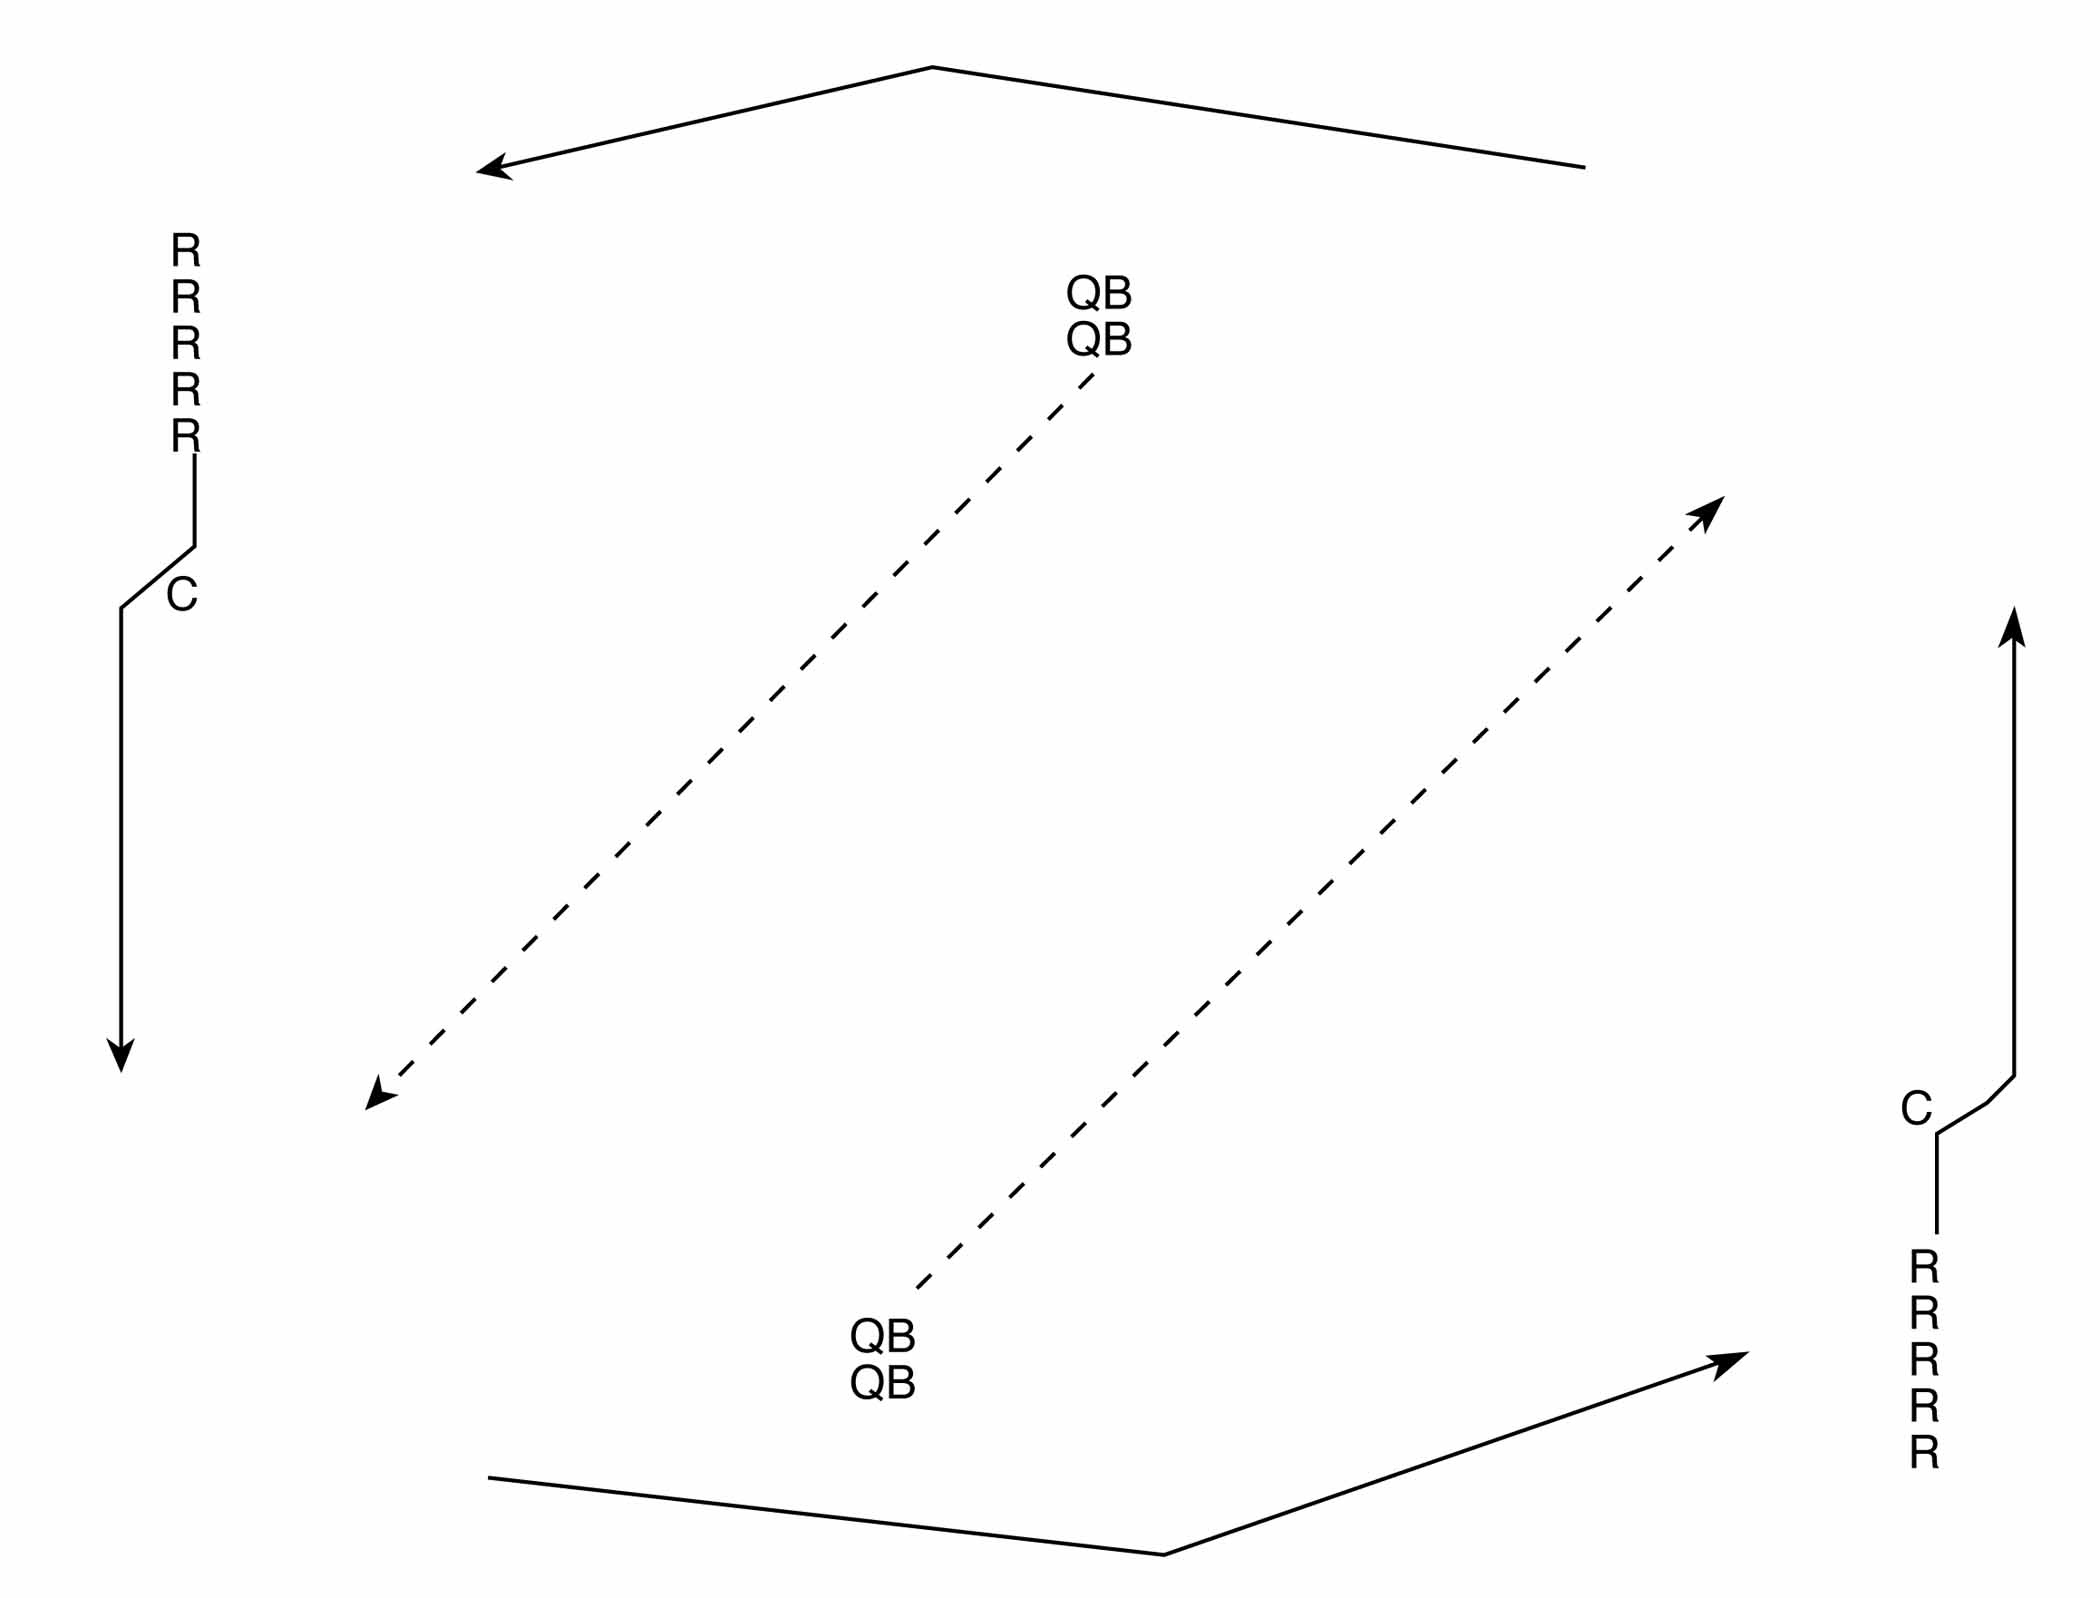
Drill # 3 – ROUTES ON AIR – This drill is designed to improve your quick passing game. The receiver reads the signal of the coach as to which route to take and the QB attempts to get the pass off just before the receiver’s break.
Drill # 4 – OPTION ROUTE – Have the receiver read the action of the inside linebacker and react off of his movement. If the LB is out, the receiver cuts in. If the LB is in, the receiver runs out. Design a dump off route also to work on the flat defender.
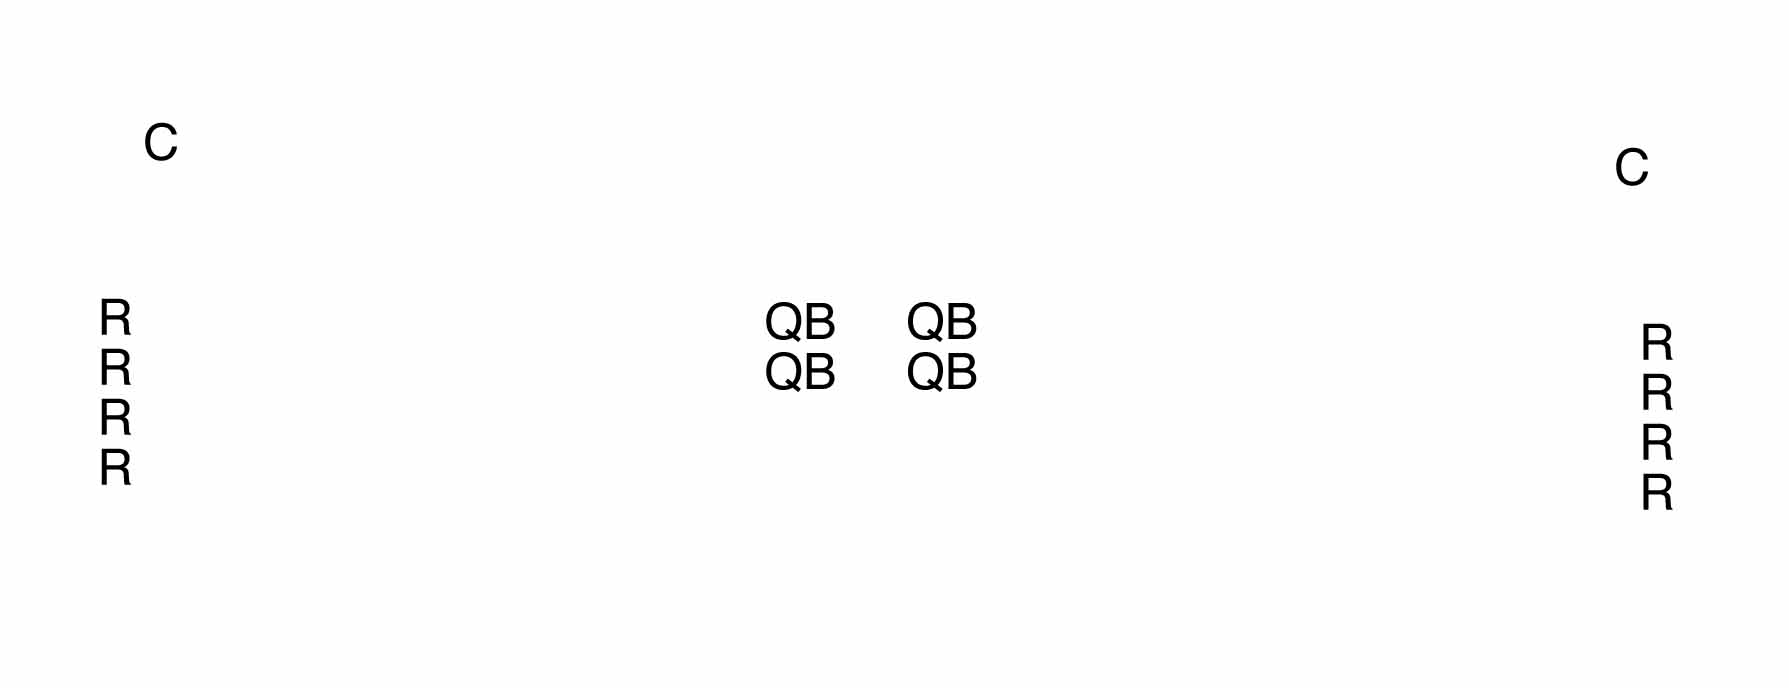
Drill # 5 – MAN DRILL – In this drill, always attack the technique of the defender. Work routes on man-on-man coverage and teach double moves for the receivers.
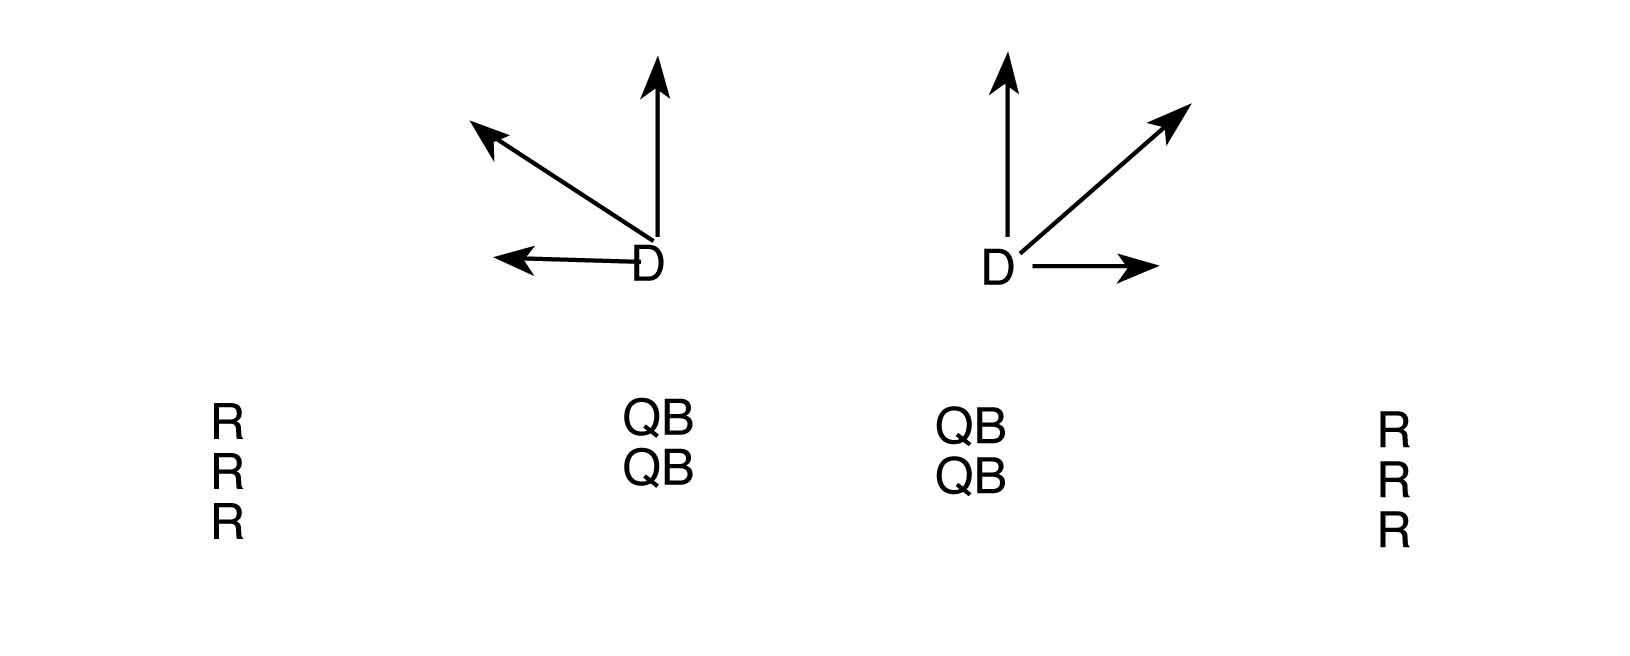
Drill # 6 – ZONE DRILL – In this drill, work to the open area off of the drop of the defender. The QB passes quickly to his receiver, reading and reacting to where the flat defender is positioned.

Drill # 7 – BACK SHOULDER THROWS – We start this drill without defenders, working on the timing of the pass to the receiver’s back shoulder. The QB attempts to hit the receiver 15-20 yards downfield. The receiver runs his route and stops just to catch the ball. Eventually defenders are added to this drill as the QB works on vertical routes. He then throws to the receiver vertically or to his back shoulder, depending on the position of the defender.
About the Author: “Developing the High School Quarterback” is from Gene Suhr’s book, “First Downs and Touchdowns.” The book is available online by emailing Coach Suhr at gsuhr1221@hotmail.com. Now a member of the Nebraska High School Sports Hall of Fame, Suhr had an overall coaching record of 200-95 including two Nebraska State Championships.