THE UP-BACK PACKAGE is a great way to cause defenses to react to what you are doing, thereby causing them to get out of what they want to do. When defenses have to adjust their basic defensive fronts, it puts them at a great disadvantage. Even if your opponent knows you run the up-back package, it still is going to force the defense to spend extra practice time preparing for it.
The up-back package still allows you to run all of your running plays from this formation. Plus, it allows your interior linemen to base block while the up back traps, kicks out or lead blocks.
Before diving into the details of the up-back package, it is important to note some coaching points about the package.
The up-back position is either an athletic lineman or a second fullback.
The formation is run with many backfield looks.
Most play-action passes are run from it.
The use of motion is effective when used with this formation.
It is possible to use a “tackle over” to give the package an unbalanced look.
The up-back package is an adjustment that can be used at any time during the season to cause problems for an upcoming opponent.
up-back
formations
The following six diagrams show the basic up-back formations.
DIAGRAM 1: Up-Right Formation. The up back is set to the right with two additional players set to his outside on the line. The tight end is on the left side of the line.
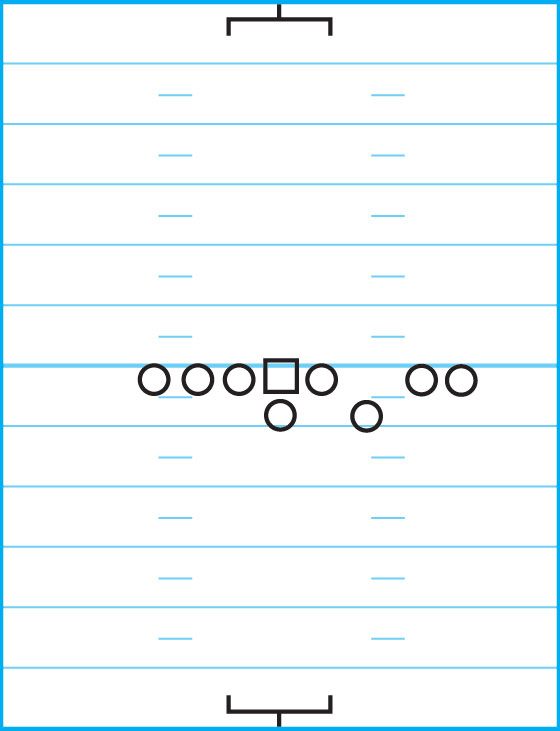
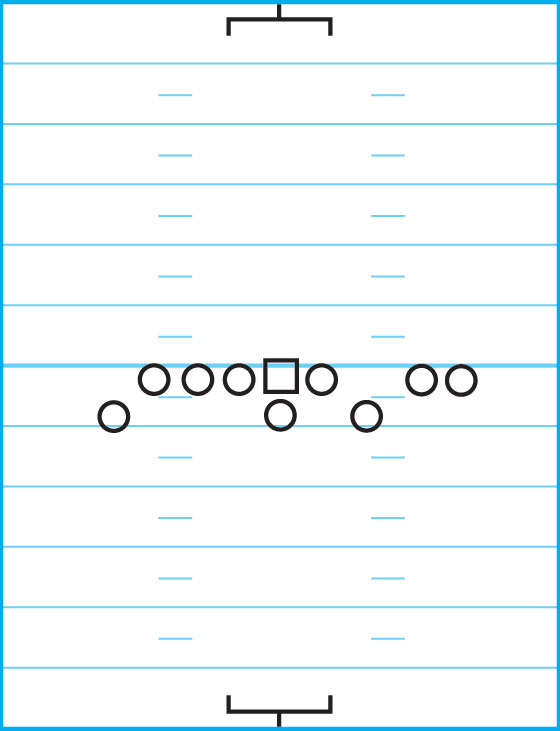
DIAGRAM 2: Up-Left Formation. The up back is set to the left with two additional players set to his outside on the line. The tight end is on the right side of the line.
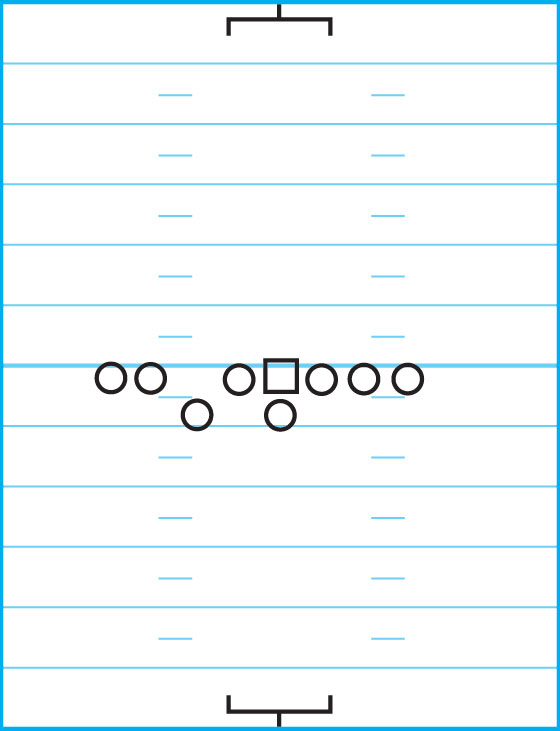
DIAGRAM 3: Up-Right Strong. The up back is set to the right with two additional players set to his outside on the line. A wide receiver is set at the depth of the up back (near the sideline) on the right side of the field as well.
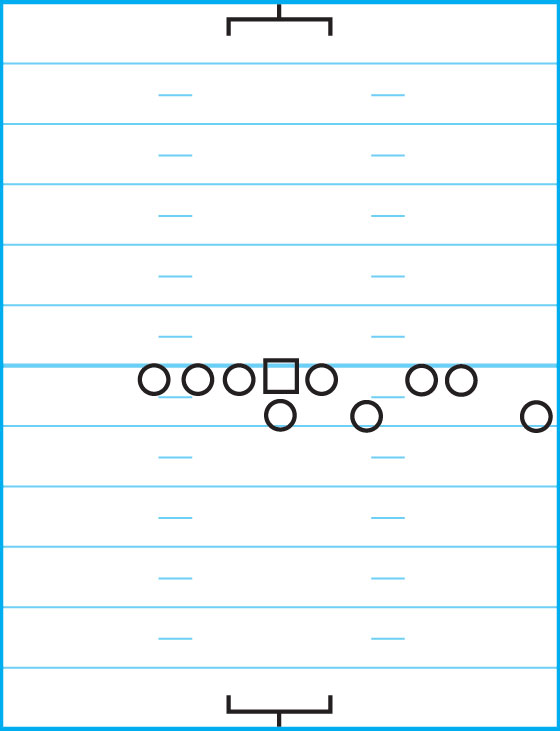
DIAGRAM 4: Up-Right Weak. The up back is set to the right with two additional players set to his outside on the line. A wide receiver is set at the depth of the up back (near the sideline) on the left side of the field.
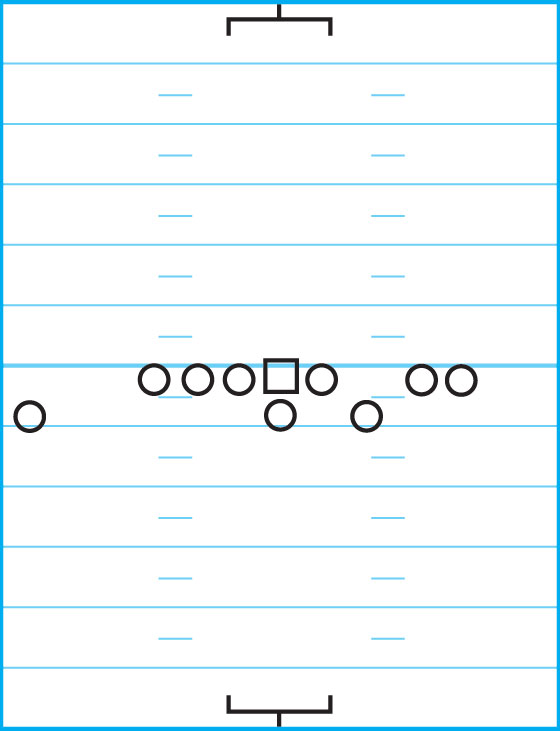
DIAGRAM 5: Up-Right Ram. The up back is set to the right with two additional players set to his outside on the line. A wide receiver is set at the depth of the up back on the right side of the field but not as close to the sideline as in Up-Right Strong (Diagram 3).
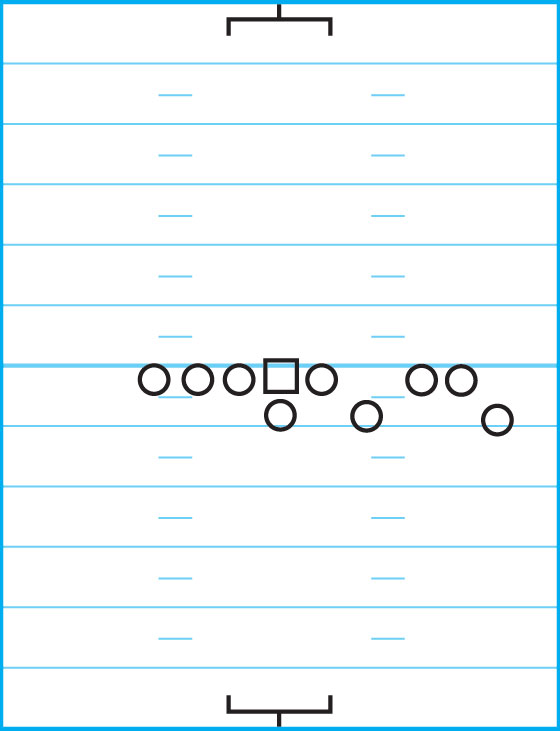
DIAGRAM 6: Up-Right Load. The up back is set to the right with two additional players set to his outside on the line. A wide receiver is set at the depth of the up back on the left side of the field closer to the offensive line than in Up-Right Weak (Diagram 4).
up-back plays vs. 50 defense
The following eight up-back plays are effective against the 50 Defense.
DIAGRAM 7: Up-Right I Dive. The up back and the offensive tackle double-team the defensive tackle. The up back then moves to the second level. The play-side guard blocks the linebacker toward the middle of the field, which opens a hole for the FB who received the handoff from the quarterback.
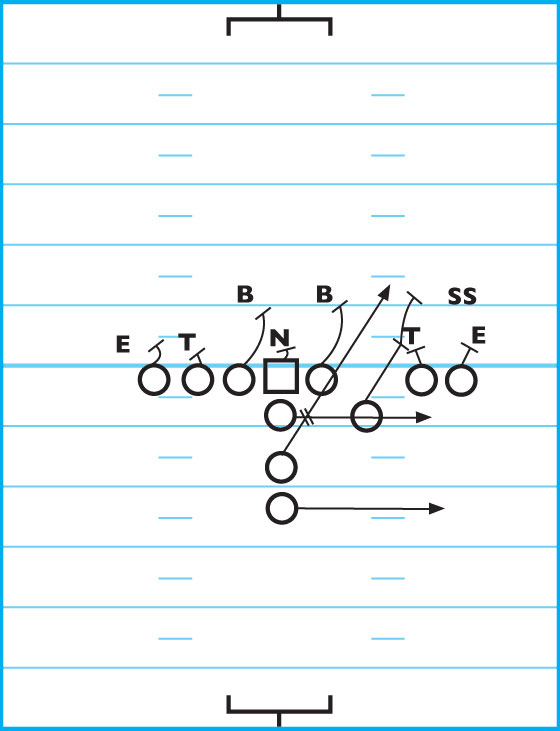
DIAGRAM 8: Up-Right I Iso. The play-side OG double-teams the nose tackle with the center before moving to the second level of blocking. The FB runs through the space vacated by the play-side OG to block the LB. The QB steps left then rolls back to the right to give the running back a handoff.
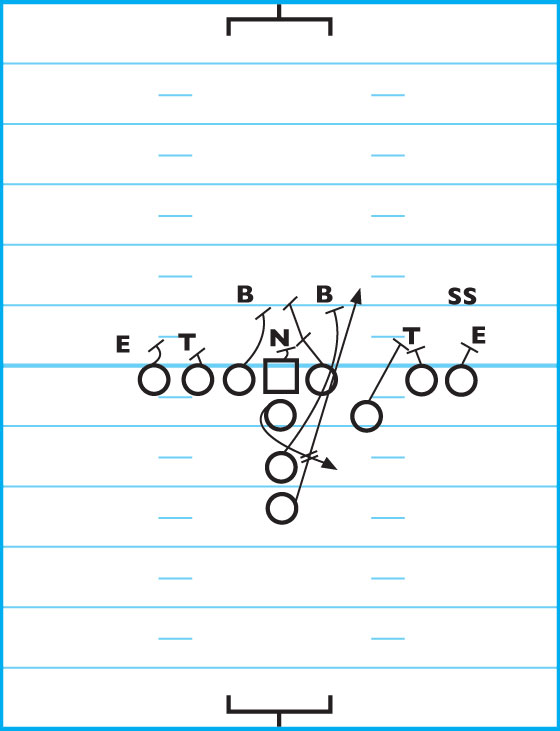
DIAGRAM 9: Up-Right I Belly. The up back’s role is to run to the right and parallel to the line of scrimmage, then block the DE. The play-side OT blocks the DT to the inside of the field while the play-side end blocks the strong safety. This creates the hole for the TB.
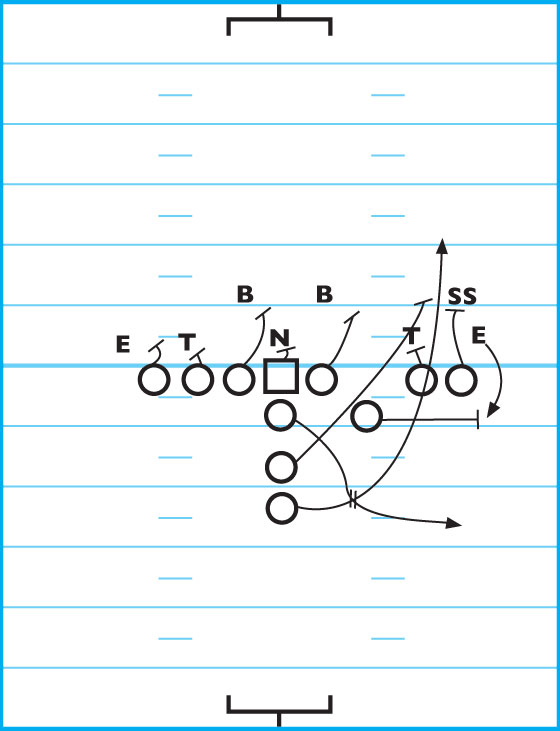
DIAGRAM 10: Up-Right Right Power. The FB handles the DE this time. The up back blocks the DT. The play-side OT takes care of the SS and the play-side end goes to the second level to help block for the RB. The QB hands to the RB and rolls left.
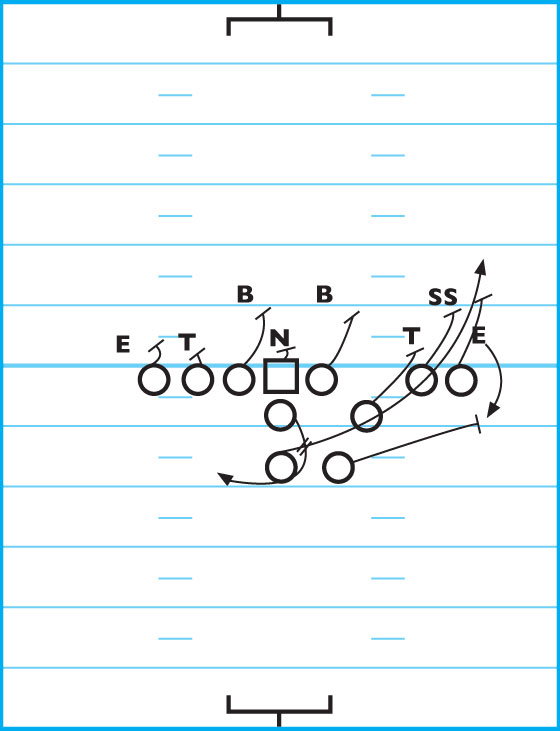
DIAGRAM 11: Up-Right Right Counter. The up back comes across the field to pick off the pursuing DT. With the help of a block on the LB by the left-side OT, the FB takes the handoff and runs the counter with the TB getting the fake handoff and running to the right.
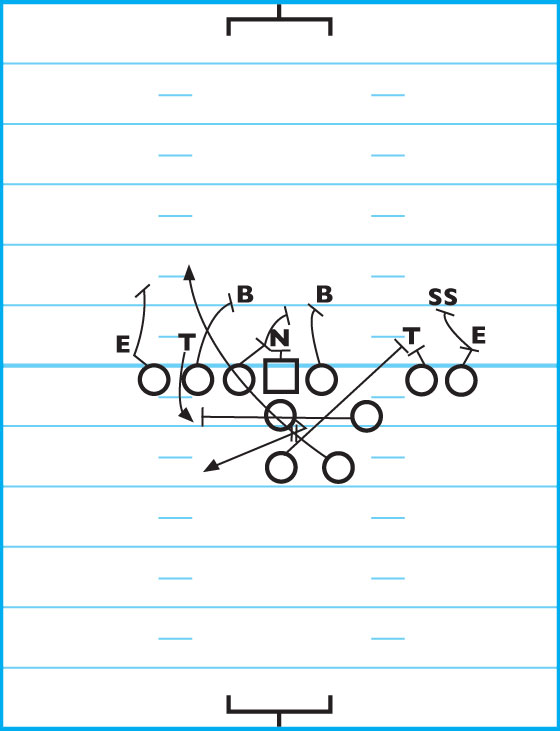
DIAGRAM 12: Up-Right I Dive Weak. The FB gets the ball this time and goes left through a hole created by the OG blocking the LB to the inside and the OT forcing the DT to the outside.
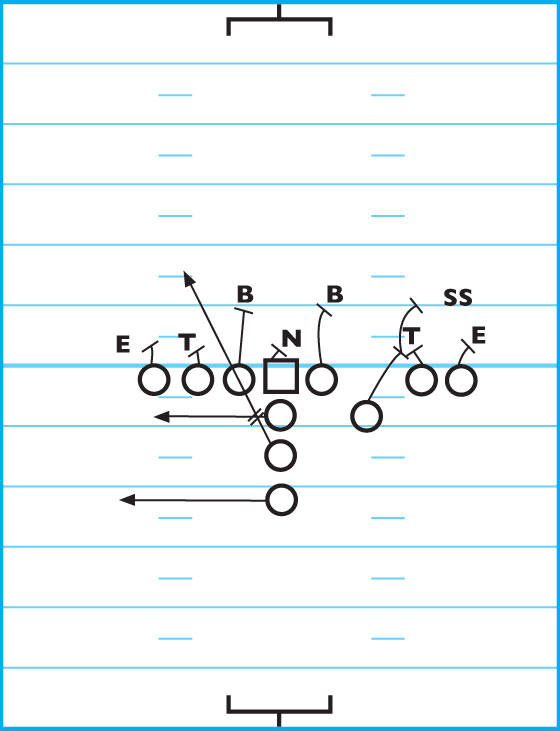
DIAGRAM 13: Up-Right I Option Weak. This play has the same responsibilities as the previous play but this time the QB keeps the ball and runs left with the TB keeping pitch distance. The QB pitches to the TB who should be able to get around the end.
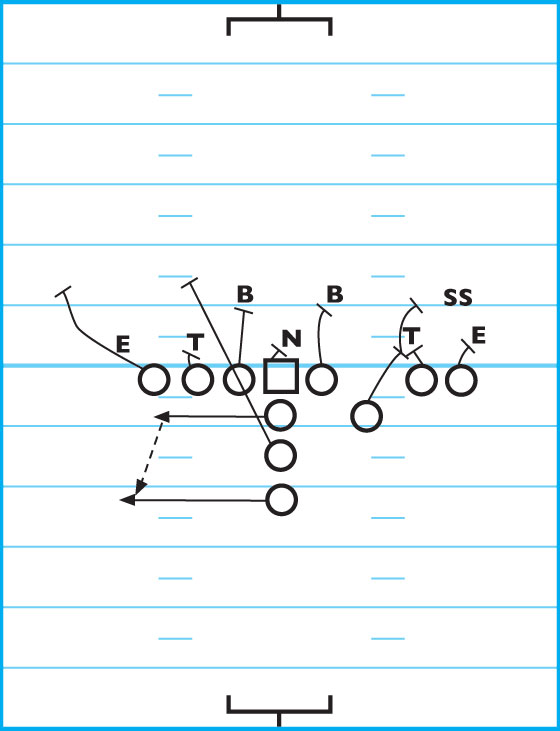
DIAGRAM 14: Up-Right I Toss Sweep. The up back and the FB get to the outside to clear space for the TB.
up-back plays vs. 40 defense
The following four up-back plays are effective against the 40 Defense.
DIAGRAM 15: Up-Right I Iso. The FB blocks the LB and the up back clears space for the RB, who hits a hole helped by OG’s block.
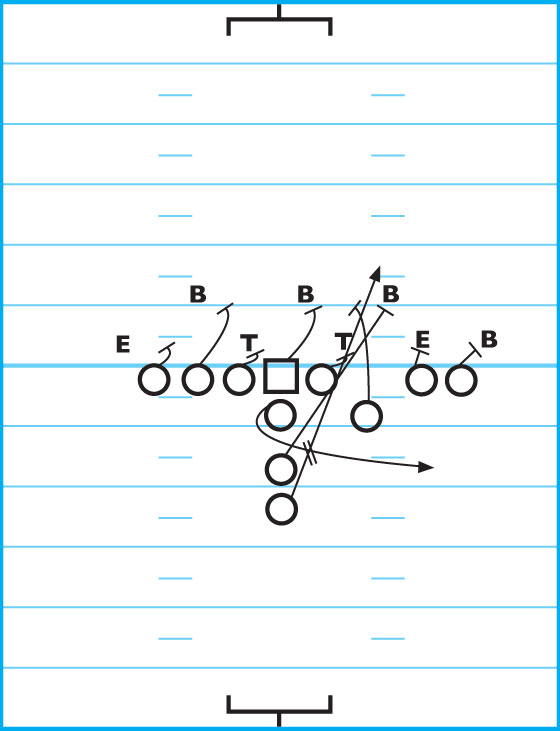
DIAGRAM 16: Up-Right Right Dive. The FB receives the handoff and hits a hole created by the up-back block of the LB and the OG’s block.
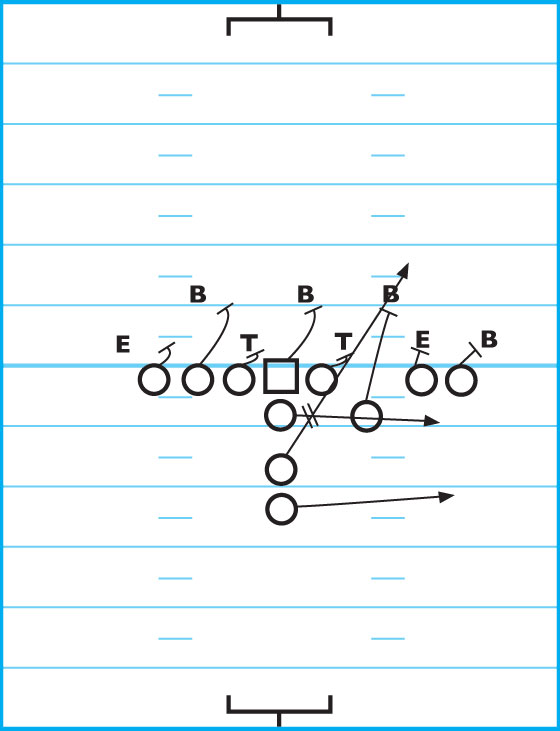
DIAGRAM 17: Up-Right Split Trap. The RB on the right runs the trap through the area cleared by the left TE and OT. The up back comes across the field to pick off the DE.
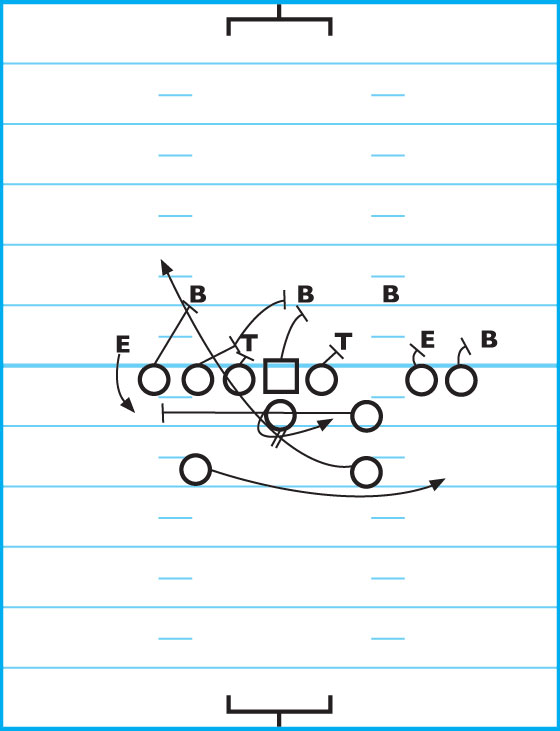
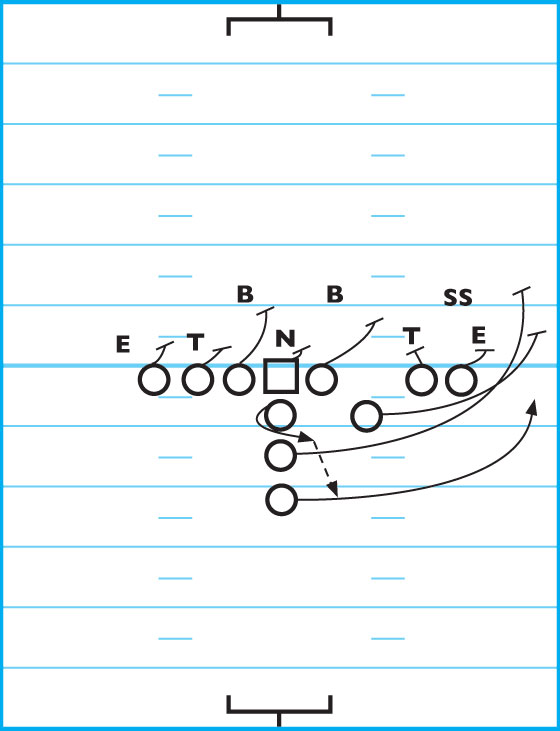
DIAGRAM 18: Up-Right I Iso Pass. The FB blocks the LB. The TB runs to the flat. The up back works his way to the second level with the help of a block on the LB by the FB. The QB steps left and rolls right hitting either the up back who is behind the LBs or the TB in the flat.
