SHOTGUN OFFENSES ARE basically viewed as passing offenses. Our offense is a combination of the wing-T, I-formation, West Coast offense and wishbone — all rolled into a shotgun approach.
Our ideal play-calling combination for a game would be passing 45 percent of the time and running the ball 55 percent of the time — although it’s predicated on the type of defense we’re facing from game-to-game and from down-to-down.
We like to use the triple- and double-option out of the shotgun to complement the running game. If the defenders are continuously thinking about their option responsibilities, then they’re not going to be as aggressive as they normally would, nor will they cover passes as effectively.
We’ve also had a great deal of success using the option to supplement our spread offense game plan and it’s proven to be a great way to get the ball to our play makers in the open field.
Using Motions For The Option
We use letters to represent all of our skill players and the motions for the option come off these letters. The two wide receivers who are off the line, for example, are called “Z” and “H.”
These are the two players that we really need to get the ball to in our running game, as well as our passing game. We will use two calls for the option motion, one is “Haze” (for the H-back) and the other is “Zap” (for the Z-receiver).
We can use either of these motions in our basic triple- or double-option plays. This is just another way to get our play makers the ball.
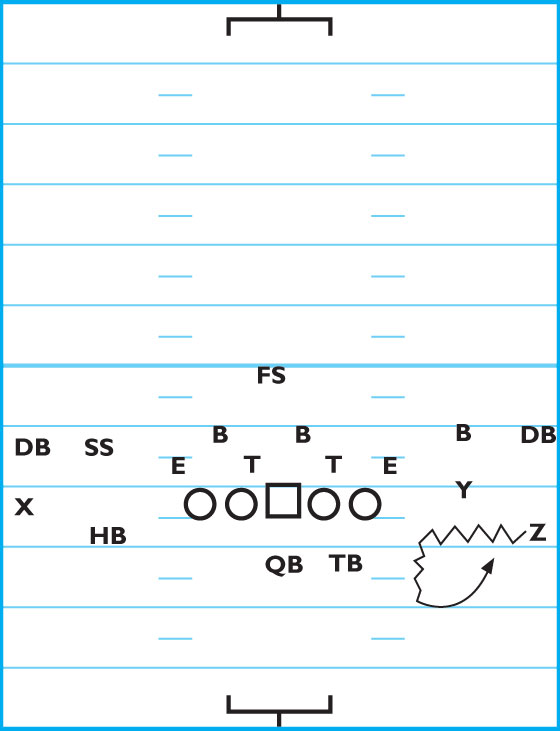
DIAGRAM 1: “Haze” Motion. For this motion, send HB to where the ghost FB would be in the gun and then move into a 4-by-4 alignment behind the QB for the option.

DIAGRAM 2: “Zap” Motion. The Z-receiver uses short motion to the offensive tackle on the call side, then drop-steps twice into a 4-by-4 alignment for the option.
Triple-Option“Right Doubles”
Our triple-option play can be run from a variety of formations, but for purposes of this article, we’ll cover the basic package out of “doubles” (2 receivers to the right and 2 to the left).
The Z-receiver and Y-receiver are aligned to the called side, while the H-back and X-receiver go to the weak side (see Diagram 2 for the initial alignment). The tailback goes to the called side as well unless he hears a switch call.
The play is called “Right-Doubles” with either Zap or Haze as the read options.
For the offensive linemen, the play-side offensive guard, play-side offensive tackle and center all gap block down to the linebackers. The backside OG pulls and traps the end man on the LOS, while the backside OT zone blocks to the play side.
The TB takes a 6-inch step, passes the QB on the second step and gets into the hole by the third step.
The QB reads the backside defensive end. If the DE crashes down, the QB keeps the ball and either turns the corner and heads upfield with the ball or makes an option pitch.
If the DE comes upfield, the QB lifts up on the ball and gives it to the TB (called the Dart play).
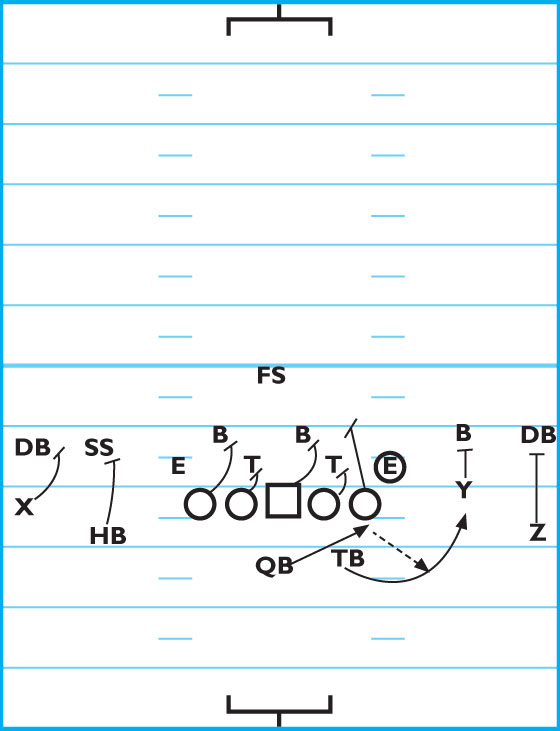
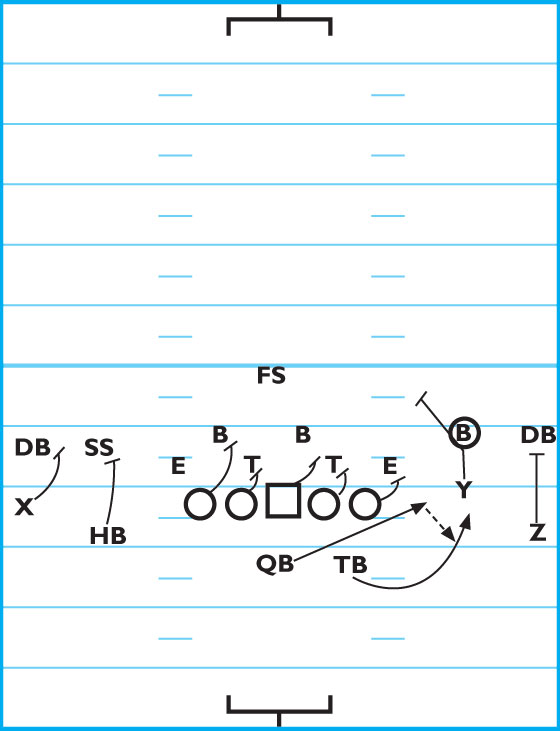
DIAGRAM 3: “Right Doubles” (With Zap Read Option).
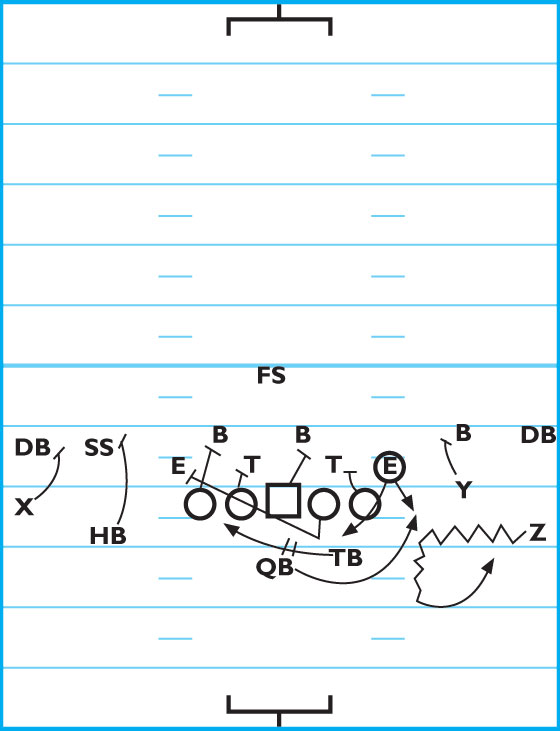
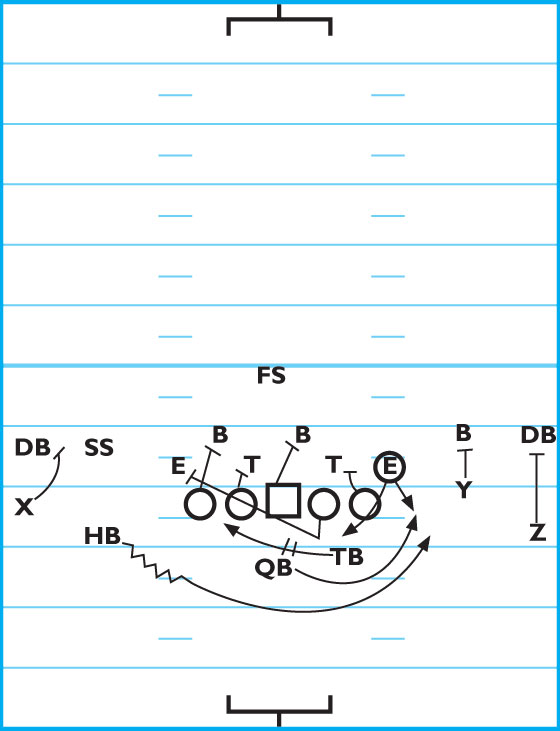
DIAGRAM 4: “Right Doubles” (With Haze Read Option).
Dart Fake Into Pitch phase
We also have a call to fake the Dart, not read it, and get right into the pitch phase of the option.
On this play, the play-side OT zone blocks to the play side and pins the DE. The play-side OG, center and backside OG and OT zone block to the play side. Receivers (X, Y and Z) all block the man opposite, while the TB fakes the dart play and blocks the backside DE.
DIAGRAM 5: Haze Dart Option.
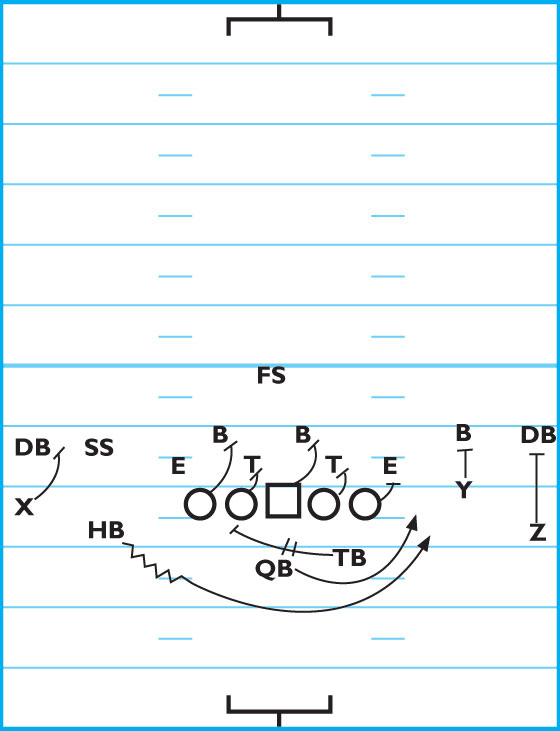
The QB sells a fake handoff to the TB on the dart play and carries out the option with the H-back or Z-receiver. In the case of Haze call, the option is run with the H-back.
Speed Option INTO The Gun
With this offense, we have also had a lot of success with a straight speed option look to isolate the QB and TB in the pitch phase. This can be run with either a “Free” or “Crack” call.
DIAGRAM 6: “Free.” The play-side OT has a free call to let the DE go free and seal the inside LB. The rest of the offensive linemen zone block to the play side, while receivers X, H, Y and Z stalk block.
The QB attacks the DE’s inside shoulder and either makes a pitch to the TB or keeps the ball on the option. The TB takes a drop step and maintains a 4-by-4 pitch relationship with the QB.
DIAGRAM 7: “Crack.” The play-side OT zone blocks to the play side until he reaches and pins the DE. The rest of the offensive linemen all zone block to the play side, while receivers Z, H and X stalk block. The Y-receiver makes a crack block on the inside LB.
The QB attacks the inside LB’s inside shoulder and either makes a pitch to the TB or keeps the ball on the option. The TB takes a drop step and maintains a 4-by-4 pitch relationship with the QB.
Successful Shotgun Attack
The plays described in this article are just a few ways that we have used the option in our shotgun attack.
Over the past two seasons, our team has had a lot of success in using this offense to attack the defense from a wide variety of angles.
This offense is also a great way to get the ball into the hands of those players who have the best chance of taking it all the way to the end zone.