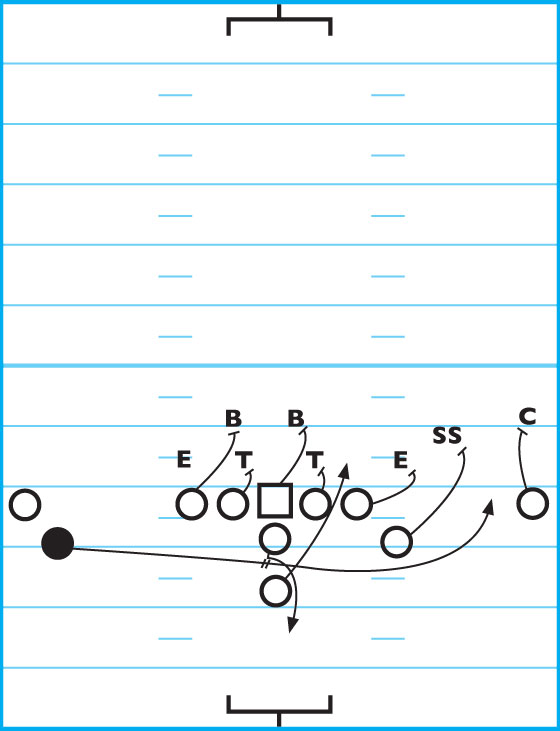
OUR OFFENSIVE PHILOSOPHY follows a true wishbone mentality, running the midline, veer and outside veers — complemented with a variety of power plays, counters and bootleg passes. But nothing has had such a quick impact to create a big play as adding the “fly sweep” to our offense.
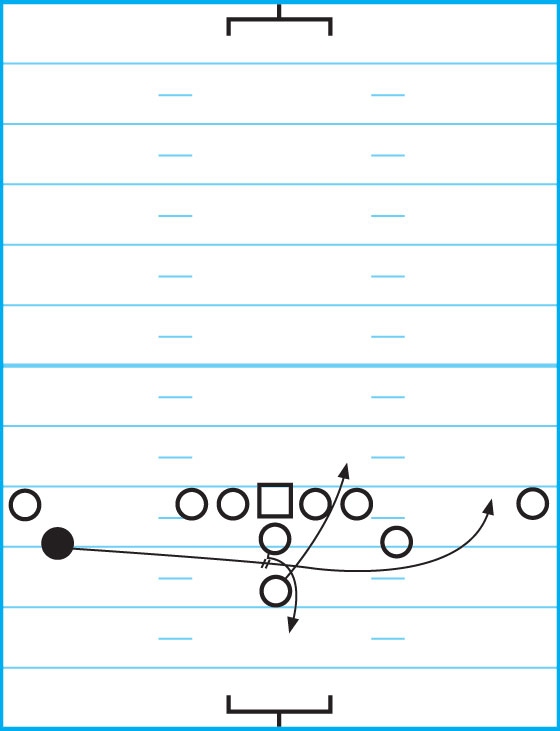
DIAGRAM 1: The Fly Sweep.
As excited as we were with the success of the play, initially it was only good one or two times per game. We developed a series of plays that, at the beginning of the fly motion, appear to be the same play. The complementary plays could be as explosive as the original play and would slow down defensive keys as to what was developing. The fly-bone plays are our teen series.
DIAGRAM 2: 12-13 Belly. With the halfback heading toward the quarterback, the QB times the snap for when the HB is directly behind the backside offensive tackle. The QB reverses, gives a token fly-sweep fake and extends a two-handed handoff to the fullback at the guard-tackle gap (our 2 and 3 hole). The QB retreats in a 5-yard drop.
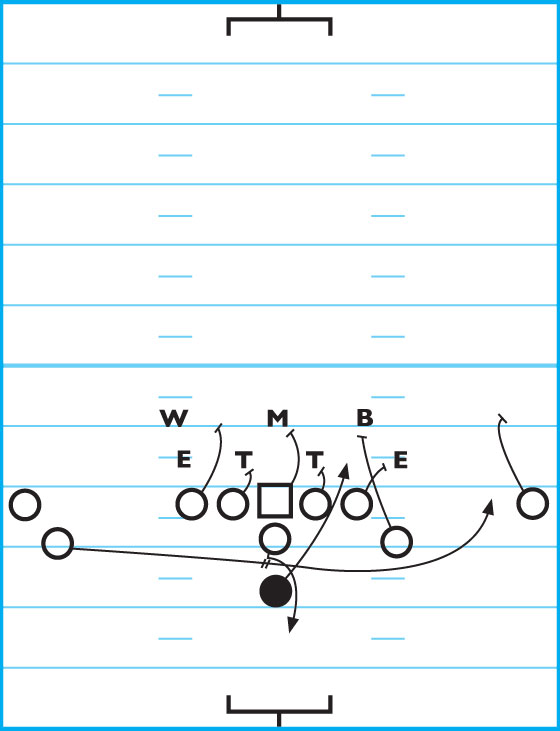
DIAGRAM 3: 14-15 Belly Back. This play starts with the same motion, except the FB takes one counter step at the 2 or 3 hole, then on the next step, runs out to the backside 2 or 3 hole.
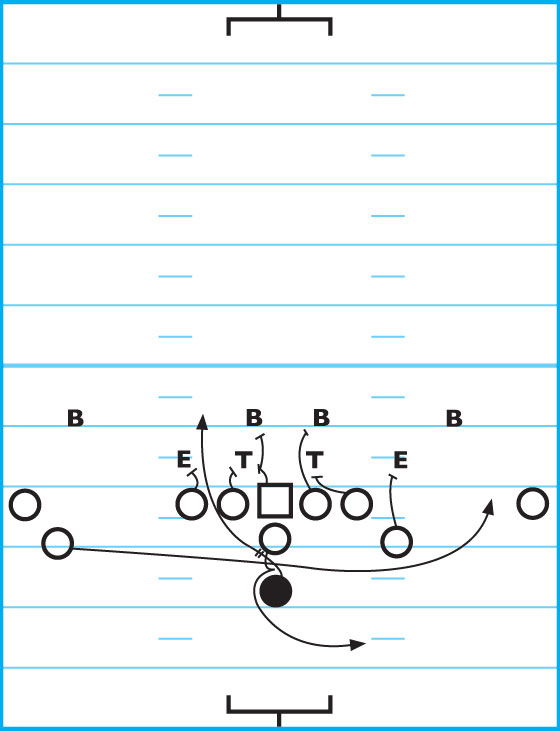
The QB follows the same steps, only on the Belly Back he allows the FB to come back across his body and gives a two-handed handoff. After the handoff, the QB bootlegs away.
DIAGRAM 4: 16-17 Quick. The QB fakes the fly sweep and makes an option pitch to the FB, who takes the pitch at or about the OT’s rear end. The FB needs to drop-step to gain some depth.
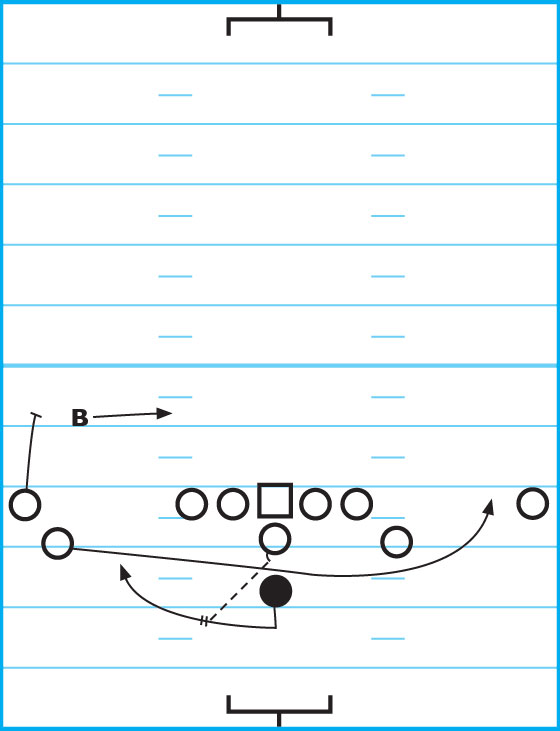
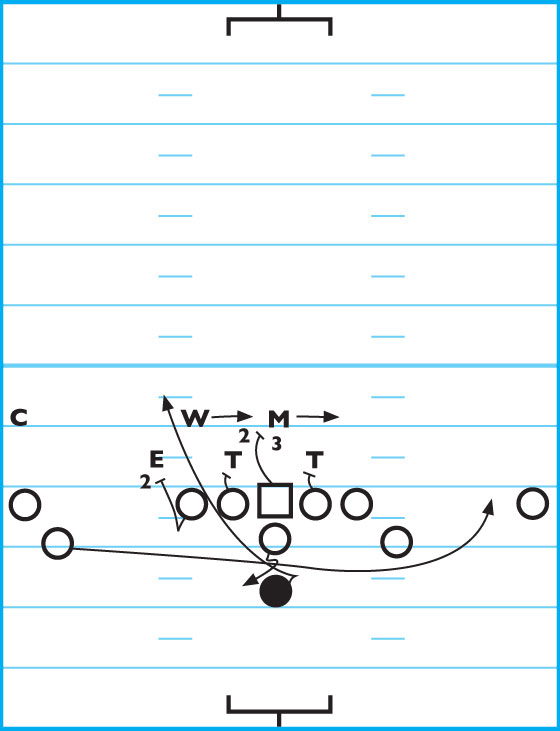
DIAGRAM 5: 18-19 Fly. The basis of the series, the sweep, is beginning with kick-start motion by the QB. The HB needs to get moving as the QB times the snap with his motion. In all sequences in this series, the ball is snapped when the HB is at the OT’s rear. A two-handed exchange is made between the QB and “flying” HB.
The QB locates the belly of the FB, fakes the belly play and retreats on a 5-yard drop. After taking the exchange, the HB needs to be prepared to gain depth in the event of penetration from the defensive end position.
DIAGRAM 6: Offensive-Line Responsibilities. We simplify the blocking for our linemen and use rule blocking to coincide with the rest of the offense. However, inside and outside zone-blocking would also work very well. On the Belly and Belly Back, we block “big-on-big” or what’s referred to as man blocking (1 and 2 on the line of scrimmage; nose guards are 0 for centers).
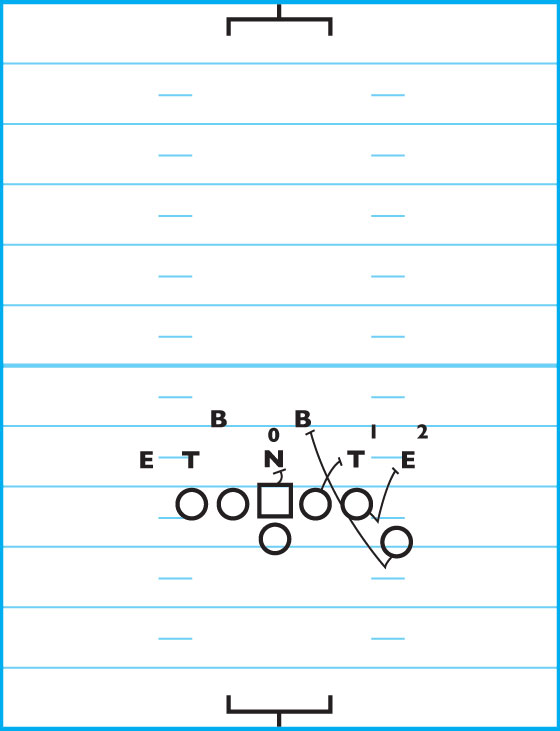
DIAGRAM 7: Man Blocking With Slot On LB. On 12-13, we block man and use the slot to lead on the linebacker.
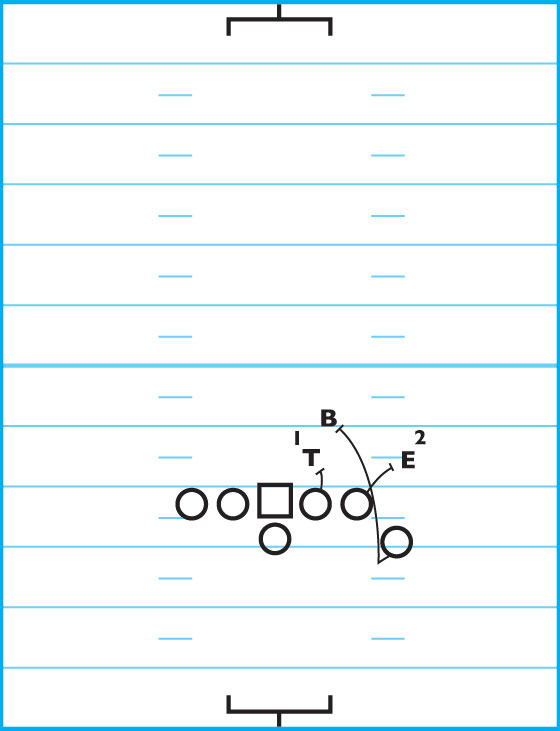
DIAGRAM 8: 14-15 Belly Back. Running the 14-15 Belly Back is the same for the offensive linemen, as they’ll block man-on-man. Count on the sweep and the counter step of the FB to account for the LB. The center will block man to the play-side gap all the way to the LB and, possibly, get a piece of the LB.
16-17 Pitch, 18-19 Fly
DIAGRAM 9: 17 Pitch.
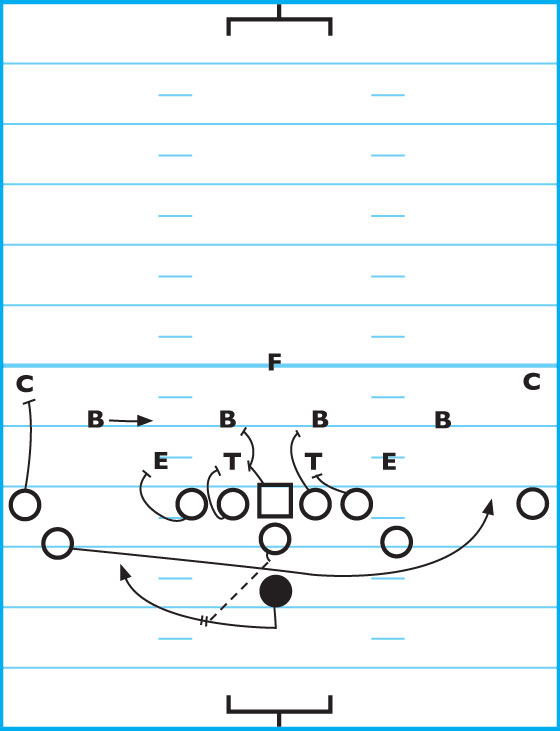
DIAGRAM 10: 18 Fly.
Line blocking on the pitch (16-17) and the fly (18-19) are the same. The offensive line will “reach man” block or the guard will reach 1’s play-side hip and the OT will reach 2’s play-side hip.
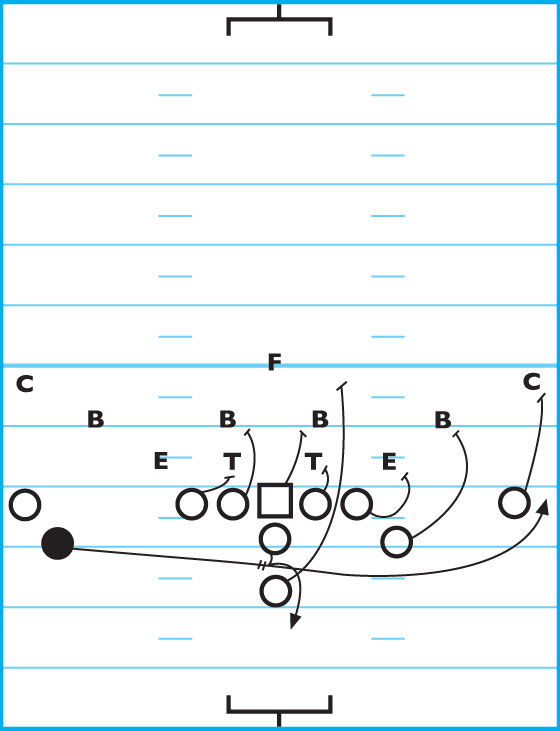
The offensive linemen are taught to stay engaged with their man as long as possible to allow the FB (pitch) or the HB (fly) to get around the end. The play-side OT should gain a little depth as he reaches the DE (2).
In the event the DE is playing aggressively and getting upfield, this provides the OT with some cushion and still allows him to hook 2. The key is to maintain contact and not allow him to get upfield to disrupt either play.