DEFENSIVE COORDINATORS are getting more comfortable defending the various spread offenses that are popping up everywhere across the country. Gone are the days when the defense would be forced to play a base coverage against 3 or 4 wide receiver personnel groupings.
One way that defenses keep a play-caller guessing is by blending zone and man concepts and simply mixing up the coverage calls. To counter this trend, offenses need built-in flexibility within the route structure. Combining route concepts speeds up the decision-making process for the quarterback, which results in fewer sacks.
Our team sees a good deal of Cover-2 and Cover-3, so our schemes must be built around allowing our receivers to attack both of these coverages. We also see “man free” and pressure looks out of Cover-0 look. Therefore, we need zone beaters, man beaters, a blitz throw and an aggressive shot down the field all in one play.
Since practice time is limited, we can’t have 300 passing plays to attack these different coverages.
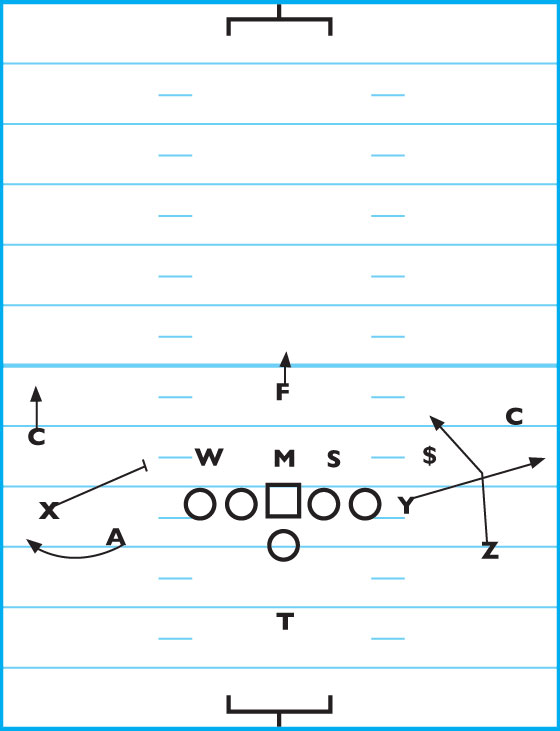
DIAGRAM 1: “Alabama 4.” The A-receiver is on the ball — running a corner or “sail route,” breaking at 10 to 12 yards, depending on coverage and release. A is a key part of the Cover-2 beater, as he attacks the hole on the sideline between the corner and safety working over from the hash. Against a middle-closed, Cover-3 look, A can push more vertical.
X is off the ball and splits 6 yards from the sideline. He must run a short curl route 6 to 8 yards deep. The curl holds the hard Cover-2 corner and gives the QB a shot at the sail route over the top. Against a Cover-3 or Cover-4, the curl is a high-percentage throw for the QB.
Z splits 5 yards away from the tackle and runs a second-level crossing route, working to a depth of 10 yards. The crosser by Z gives you a good man beater and provides a favorable match-up working against a
LB. He must get a clean release inside and sift through the traffic to set mesh with the backside Y-receiver.
Y runs a first-level shallow route at 5 yards. Since Y has his hand on the ground, he will likely get delayed a bit more — so we let him run the shallow route. You want Y to be ready to immediately catch a pass upon his release against a blitz. (Z could also be a blitz throw.) Usually, we’ll throw into the blitz, so this combination gives us some flexibility.
The QB must get a good pre-snap read and work one concept or the other. Against Cover-2, you want him working the smash concept and reading the corner. Against a Cover 3 or Cover 4, you want him looking for the curl route on time. He takes 5 quick steps and gets the ball out without a hitch. Against a Cover-1 or Cover-0, the QB can work the mesh concept with Z and Y.
Even against a zone, the QB can come off the smash and find one of the mesh routes settling down in a void. This is a 5-step drop for the QB unless he sees a blitz. He’ll need patient footwork for the sail and mesh routes. Five rhythm steps and a hitch times it up better.
If a team has trouble protecting the passer, a 3-step game can help. You can use the same ideas for combining route concepts in the 3-step game.
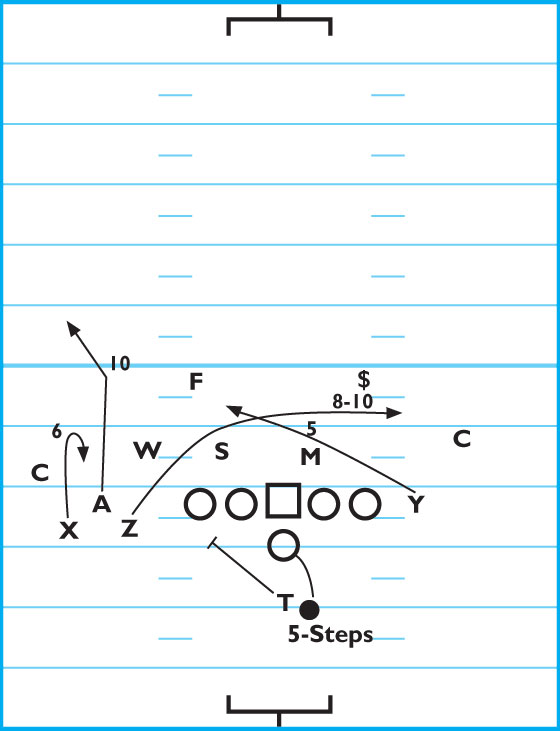
DIAGRAM 2: “Squid.” X runs a quick screen route. He punches upfield for two steps and retreats to the LOS, giving the QB a full target.
A works from the slot and runs a 10-yard sail route. Since this is a 3-step drop play, A must get his head around on the break and keep accelerating while looking back at the QB.
Since X gets little depth, it doesn’t allow the Cover-2 CB to play both WR.
The other side of the play features a Cover-3 beater. Y runs a flat route working to a depth of 4 yards with his head around. Y could be a blitz-beating throw for the QB.
Z runs a slant route pushing up 4 yards before breaking it off. You’re putting a horizontal stretch on the flat defender with this combination.
The QB can be under center or in the shotgun and must get a good pre-snap read and pick a side. the coverage dictates which side he works. Against Cover-2 he’ll work the smash concept, reading the corner.
Against Cover-3, he’ll look at the flat/slant combo while reading the flat defender.
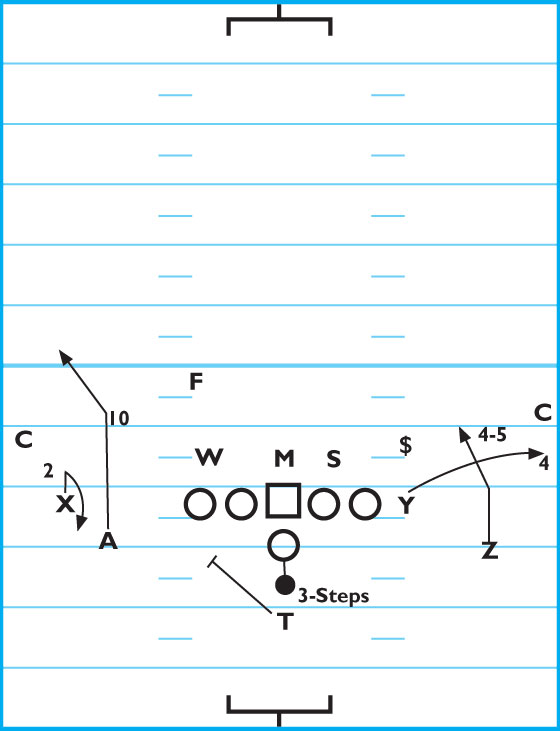
DIAGRAM 3: Bubble Screen. You can also package this with a bubble screen to the open end of the formation.